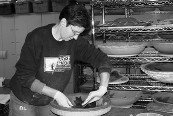
I first started taking pottery classes back in 1993 through Grosse Pointe Community Education with one of Grosse Pointe South High School's art teachers, Gene Pluhar. (Actually, Gene's first year as a teacher in the school system was my first year as a student when he was my gym teacher for first grade.) I had registered for a jewelry making class with Gene as a high school junior but ended up having to drop the class as schedule changes were required due to issues with my Math 3-A teacher. Gene, however, generously gave me time after school on a couple of occasions to assist me with a weaving project I was pursuing on my own. I had always wanted to take pottery but it had never really worked into my college preparatory schedule so, when I moved back to Michigan and ended up in an apartment in Grosse Pointe Park, I jumped at the chance to take adult ed classes with Gene in his enviably equipped classroom.
Gene taught just about every form of three-dimensional art imaginable - pottery, jewelry making, sculpture; you name it, he had it down. And his classroom was equipped in a manner commensurate with his capacities - propane torches, table saws, drill presses, sand blaster, air compresser - all in addition to the gas reduction kiln, electric kiln, jewelry kiln, potter's wheels, slab roller and large-capacity extruder usually associated with the typical potter's studio. I tried as many of the "toys" as possible - probably more than most folks, as I kept pushing the envelope, with Gene's assistance. (I still covet my own sandblaster.)
Although I worked on the wheel quite a bit and did manage to develop some competency on it, it seemed kind of... limiting to me. Hey, it was like being on the merry-go-round - it just did one thing: it went round, and round, and round, and round. So I started exploring the possibilities of the other pieces of equipment - the slab roller and extruder.
This extruder was not the small-capacity, make-a-handle extruder with which a lot of educational facilities content themselves. This was a monstrous, clay-consuming monster of an extruder: you had to feed a good 25 pounds of clay in the beast's maw to get anything out of it. But, using the large dies, you could get good-sized cylinders, octagonal cylinders and square forms you could really make into something. In addition to a series of lamp bases and containers, I made a few tool caddies which I embossed with some leaves, which I still have.
When I set up my own studio, the two things I knew I wanted to have was the largest slab roller and the largest extruder I could afford. (I don't like being limited by my equipment, as I have enough inherent limitations!) In the time I've been working in my own studio, the old bucket I used to carry my tools around really hasn't been particularly workable - especially since I now have a lot of tools. I decided to revisit the tool caddy concept using my high-capacity extruder.
To use the extruder, you attach the desired die to its underside using four large C-clamps, making sure the metal clamps holding the pieces of the die in place are inside the extruder. Cut chunks of clay and feed them into the opening, using the plunger to force the clay into the reservoir. Keep feeding the clay until it starts to come out of the bottom through the die. This is where it gets tricky. To get an upright (as opposed to curved) form, take something flat (like a small slab of wood or a small kiln shelf) and hold it against the bottom edge of the emerging clay form as you continue to use the plunger the force the clay through the die. Once you have extruded the size form you desire, carefully cut it off with a cutting wire. (This is where your placement of the C-clamps can become an issue.)
Using a cutting wire, you can then cut the form to the height you desire for the forms you are fabricating. Because my tools vary in height, I wanted shorter and taller pieces; and because I wanted to be able to see the tools, I angled my cuts as well. Once the pieces were cut to the heights I wanted, I rolled out a slab of clay, placed each cylinder on it and cut out a base for each one. Scoring and slipping the bottom edges of the cylinders and the outer top edge of each base, I slipped and affixed them to one another and worked the edges together until they looked consistent. I rolled out another slab of clay and, using a set of alphabet stamps, stamped the names of the various types of tools - "Score/Poke", "Rib/Kidney", "Cutting", "Ribbon/Loop" (two of these, 'cause I have lots), "Hole Punch" and, of course, "Miscellaneous". I cut out the forms around the lettered areas and applied each to an appropriately-sized form. (I think I have to make a second "Miscellaneous" caddy, at the very least.)
Once the pieces were dry, I used synthetic steel wool to smooth all edges and then bisque fired, as usual, to Cone 06.
To finish the pieces, I wax resisted the bottoms, stained the lettered areas, a different color for each piece, which I wax-resisted that as well. (One of the labels cracked in half for some reason but I was able to affix the broken-off section with white glue and finish the glazing process with no mishaps; the fracture is only visible if you know to look for it.) I then dipped each piece in a glaze complementary to the stain color and fired on stilts.
The result? Tool caddies that not only help me organize my tools but make my work table look pretty darned cool!
Thursday, April 12, 2012
Monday, April 9, 2012
Sunflower Masks 6: Petals
The final design for the Clytie masks I've created is what I call "Petals", because I use additional tiny petals as the "accent" for the piece. This idea actually derived from my training as an (Advanced) Master Gardener, where we learned that the family of plants to which the Sunflowers belong (formerly known as the Compositae, now known as the Asteraceae) are characterized by a flowering body made up of two types of flowers - ray flowers, which reside at the perimeter of the flower and characterized by showy petals, and disk flowers, which are much less conspicuous and take up the rest of the flower head. The sequential blooming of the disk flowers explains the ongoing visits by pollinators and, therefore, the fact that these types of plants are a highly valuable resource for our native pollinators.
I decided to take this idea in a slightly different direction, by creating additional petals to accent the faces for these masks. I fabricate the mask as usual, using the two rows of petals (Medium and Tiny Sunflower outer petals for the smaller, more delicately structured female face; Large and Small Sunflower outer petals for the larger, stronger-featured male face) around the perimeter. Then I used the Tiny Sunflower inner petal cutter to make additional petals that I then attached in a manner intended to accentuate the face's inherent structure.
After bisque firing as usual, I glazed using Burnt Umber for the face; I applied Titanium Mason Stain for the entire surface of all the petals and then brushed Orange Mason Stain for just the tips, as I had for the previous post on the masks. This makes for a brighter yet more subtle color combination folks really seem to like.
To finish all of the masks, I use a type of wire I can only seem to find at Lowe's, of all places - a plastic-coated 30-lb picture wire by Ook. I like to use this product because it is less prone to rusting due to the coating; I could use stainless steel wire instead, but it is quite a bit more expensive. I loop it through the holes in the back of the mask and twist securely. These pieces are considerably less than 30 pounds, so I'm not concerned about the wire failing. (I'm not so much buying the wire for its rating as for its coating.)
This is the design I used for the mask of my best friend, Catherine which appeared in a picture taken of me for an article about the Clematis in my garden published in Michigan Gardening magazine in July 2009. I so like this photo - because it incorporates two of my three loves (the other being my cats, of course!) - my garden and my pottery. You can also see three more of the masks I've made of myself and my "sibling friends" (there are nine altogether now, including Carla, to the left of the photo, and Nancy, in the distance to the right; I'm in the back to the left; Sue Ann, Tia, Sharon, Debbie and Stephen are out there as well), all of which stay outside on their posts all year long so I can always visit with my family. (The Clematis is Clematis x 'Barbara Jackman'.)
I decided to take this idea in a slightly different direction, by creating additional petals to accent the faces for these masks. I fabricate the mask as usual, using the two rows of petals (Medium and Tiny Sunflower outer petals for the smaller, more delicately structured female face; Large and Small Sunflower outer petals for the larger, stronger-featured male face) around the perimeter. Then I used the Tiny Sunflower inner petal cutter to make additional petals that I then attached in a manner intended to accentuate the face's inherent structure.After bisque firing as usual, I glazed using Burnt Umber for the face; I applied Titanium Mason Stain for the entire surface of all the petals and then brushed Orange Mason Stain for just the tips, as I had for the previous post on the masks. This makes for a brighter yet more subtle color combination folks really seem to like.
To finish all of the masks, I use a type of wire I can only seem to find at Lowe's, of all places - a plastic-coated 30-lb picture wire by Ook. I like to use this product because it is less prone to rusting due to the coating; I could use stainless steel wire instead, but it is quite a bit more expensive. I loop it through the holes in the back of the mask and twist securely. These pieces are considerably less than 30 pounds, so I'm not concerned about the wire failing. (I'm not so much buying the wire for its rating as for its coating.)
This is the design I used for the mask of my best friend, Catherine which appeared in a picture taken of me for an article about the Clematis in my garden published in Michigan Gardening magazine in July 2009. I so like this photo - because it incorporates two of my three loves (the other being my cats, of course!) - my garden and my pottery. You can also see three more of the masks I've made of myself and my "sibling friends" (there are nine altogether now, including Carla, to the left of the photo, and Nancy, in the distance to the right; I'm in the back to the left; Sue Ann, Tia, Sharon, Debbie and Stephen are out there as well), all of which stay outside on their posts all year long so I can always visit with my family. (The Clematis is Clematis x 'Barbara Jackman'.)
Thursday, April 5, 2012
Lace Bowls 3: Goth/Steampunk Wedding Set
![]() |
| Goth/Steampunk Wedding Set |
I wanted to do something a little different. When I first worked with the lace bowls, I had made an entire series of the tiny bowls using each of the glazes in my repertoire. Obviously, some were more successful than others, but sometimes combinations of otherwise less than stellar glazes were pretty interesting. Three glazes in particular - two from the Amaco Potter's Choice series (Saturation Metallic and Saturation Gold) and one I had "inherited" from my first pottery teacher, Gene Pluhar (Metallic Black) - were relatively uninteresting on their own and/or didn't seem to play well with most of the other glazes in my palette. It took my friend Cathy Dossin's interest in the tiny Saturation Metallic lace bowl (later her Christmas gift) to pique my interest in these glazes for these pieces.
![]() |
| Goth/Steampunk Wedding Set |
I thought a set of three (tiny, small and medium) scalloped bowls would make a compelling ensemble, with the small glazed in Saturation Gold and bracketed by the tiny in Saturation Metallic and the medium in Metallic Black. I wanted to emphasize the contrasts between the three glazes - the dark graphite-like satin of the Saturation Metallic, the brilliant gold satin of the Saturation Gold and the high gloss of the Metallic Black - and how they responded to the highly-figured surface of the lace texture. As a set, they look great tied up with a nice, black (or white!) ribbon.
This set is available at a number of galleries around the Detroit area, including Firebrick Gallery in Rochester, Dancing Eye in Northville and Grosse Pointe Artists Association in Grosse Pointe. Discussions have been rampant as to whether it would better if the three pieces would be better/nicer if they were all finished with the same glaze; most come down on the side of the intriguing contrast of glaze color and character.
I dig their understated yet rebellious elegance.
Thursday, March 22, 2012
Deluxe Sunflower - Cake
When I first started working with what I now refer to as my "Deluxe Sunflower" designs, I came up with three different designs - including "Pasta", which I described some time ago. Another of those initial textures is what I call "Cake", because I use a pastry bag filled with slip (liquified clay) with a cake tip to create the center, which, for me, is somewhat reminiscent of the disk flowers characterized by members of the Asteraceae family of plants, formerly known as the Compositae, to which such popular plants as daisies, asters, coneflower, black-eyed susans and sunflowers belong.
This idea was inspired by a couple things. Many, many, many years ago, I worked at a Baskin Robbins in East Lansing (Dan Wardlow owned that business as well as one on the other side of town) scooping ice cream; this was my "half-time" job complementing my full-time job as a prep-cook, sand-man, egg-man, dinner cook at Beggar's Banquet. Once I got the job down (no, it wasn't that difficult, except for the customers!), I started helping to decorate the cakes. And I got pretty good at it, over time. And it was at least a little bit more creative than most of the other stuff I was doing at the time. (There are only so many ways you can chop an onion, really.)
Relatively recently, I came across a pastry decorating set at K-Mart when Martha Stewart's relationship with that company was going strong and they had a lot of "Everyday Living" products marketed under her name. This kit was pretty comprehensive - a couple of "parchment" pastry bags, a few thinner, clear plastic pastry bags, a set of basic tips and the plastic fittings to attach them securely to the bag, a device on which to make flowers to be transfered to a decorated cake and a frosting knife. I haven't used either of the last two items but I've had an absolute field day with the rest of the kit, and have added to it over the years. (It's a good thing...)
To fabricate the sunflower, I follow my typical process of forming a slab of clay (about 1/4" thick) over the mold and applying the petals. Now I'm ready to start applying the center. I take a pastry bag and attach the desired tip - for the "Cake" texture, I use a typical "Star" tip. I fill the bag with enough slip so that I can securely close the back of the bag and comfortably grip it with my hands (this last thing is important for the long haul). I try to get as much of the air out of the bag because blow-outs can really mess up the application of the slip, creating more work. Also, the slip has to be the right consistency: too wet, and it won't form up nicely; too dry and you're going to be working way too hard. (It does take a certain amount of strength to do this, especially over a large surface, so cut yourself some slack when you start out.) Starting from the outside edge of the flower's center, I apply "stars" of slip, working toward the center.
Once I've finished, I set the flower to dry until it's leather hard. It's important with this piece not to handle the center until the rosettes are pretty well set up or they'll smoosh. Once it's dry enough to handle without the flower collapsing of the center smooshing, I finish with a fitting and holes for wire and allow it to go bone dry before firing.
I like to use Amaco's Potter's Choice Ironstone (one of my students' favorite glazes, actually) on this piece for some reason. (There's a synchronistic dynamic for me in my work, associating certain forms to certain glazes and stains.) I glaze the center with Temmoku from the same glaze series (which I also use to add some more "umph" to the area where the fitting is attached to the back of the sunflower), wax resist it and then, when the wax is completely dry, pour the Ironstone over the top of the petals and then brush to completely coat the unglazed portions underneath. I fire the pieces to Cone 6 on bar stilts placed along the inner perimeter of the petals. The glaze breaks and pools from black through a buff to a brick red which enhances the dimensional quality of the sunflower, which is exactly the sort of effect I wanted.
Monday, March 19, 2012
Upcoming Events for 2012
I wanted to take a moment to let folks know about upcoming events at Black Cat Pottery/My English Landscape for 2012.
April 28, 2012 (Saturday), 10:00am-12:00n: Clematis Pruning Workshop. Long perceived as “difficult” or “temperamental”, Clematis are actually proven performers that can give years of gardening delight. Join us for a hands-on workshop to learn about the care and culture of these garden gems and specific pruning techniques and concerns. Bring your favorite (by-pass) pruners and chair. $10 at the event, refreshments and comprehensive hand out provided. Pre-enrollment required, including your name and contact information in case of inclement weather. Limited enrollment; the program was booked in 2010 and 2011.
June 2 and August 18, 2012 (Saturday), 10:00am-2:00pm: Annual Spring/Summer Garden Tours. Cheryl's life-long love of Clematis and more recent obsession with native plants are both immediately apparent as you arrive at her garden. Designed as a teaching and learning space rather than a design show-stopper, her garden includes over 50 Clematis, representing over 10 species as well as large-flowering hybrids, and over 130 species of native plants, ranging from Spring ephemerals to large trees. Take advantage of this opportunity to become acquainted with some of the lesser-known small-flowering species Clematis varieties and the beauties of our native flora. Cheryl's garden was featured in the July 2009 issue of Michigan Gardener. We will also feature local garden art and refreshments.
December 8, 2012 (Saturday), 10:00am-4:00pm: Holiday Open House. Join Cheryl English’s Black Cat Pottery and other Michigan artists for a day of holiday cheer. Meet the artists, enjoy holiday goodies and take care of your last-minute gift needs with handmade art for the home and garden! In addition to our garden-inspired pottery creations, we’ll be sharing our studio space with Don Schulte of Notable Greetings with his line of exquisite note cards and prints; Chris Hopp of Farmbrook Designs with his beautiful hypertufa lanterns, fountains, planters and other garden accoutrements; Tim Hanks of Bird Homes by Tim sharing his unique bird houses; Glenda Hopp of So Many Colors with her one-of-a-kind hand-dyed cotton wearables; and Cathy Dossin’s selection of whimsical hand-painted furnishings and garden accents; all made right here in Michigan! Refreshments created by Jennifer Flynn of Urban Attic and musical accompaniment provided by Charlie Palazzola. Join us for some Christmas cheer, get to know the artists and take care of your last minute gift-giving needs! Bring a friend, and pass on the word!
Don't forget that you can book a private tour for your group, as well! Visit the blog for news on other pottery events and garden insights throughout the season. We hope to see you in 2012!
![]() |
| Clematis heraclifolia "Mrs. Robert Brydon" |
| Polygonatum biflorum (Small Solomon's Seal) |
December 8, 2012 (Saturday), 10:00am-4:00pm: Holiday Open House. Join Cheryl English’s Black Cat Pottery and other Michigan artists for a day of holiday cheer. Meet the artists, enjoy holiday goodies and take care of your last-minute gift needs with handmade art for the home and garden! In addition to our garden-inspired pottery creations, we’ll be sharing our studio space with Don Schulte of Notable Greetings with his line of exquisite note cards and prints; Chris Hopp of Farmbrook Designs with his beautiful hypertufa lanterns, fountains, planters and other garden accoutrements; Tim Hanks of Bird Homes by Tim sharing his unique bird houses; Glenda Hopp of So Many Colors with her one-of-a-kind hand-dyed cotton wearables; and Cathy Dossin’s selection of whimsical hand-painted furnishings and garden accents; all made right here in Michigan! Refreshments created by Jennifer Flynn of Urban Attic and musical accompaniment provided by Charlie Palazzola. Join us for some Christmas cheer, get to know the artists and take care of your last minute gift-giving needs! Bring a friend, and pass on the word!Don't forget that you can book a private tour for your group, as well! Visit the blog for news on other pottery events and garden insights throughout the season. We hope to see you in 2012!
Sunday, February 19, 2012
Lace Bowls 2: Lotus Bowl
![]() |
| Indigo Float Lotus Bowl |
Some prized pieces of handmade lace were donated to me by my friend Deb Hall. Of Maltese descent, her maternal grandmother had won first prize at the World's Fair in the 1930s for her hand-made bedspread. You can imagine my gratitude when Deb gifted me with some of her grandmother's beautiful work, including a large oblong piece suitable for a rectangular try and various forms suitable for round bowls.
One piece in particular inspired a different take on the pieces I had been doing - a large, six-pointed star-shaped piece with a lot of texture and interesting negative space. I decided to try using the entire form instead of limiting myself to a typical bowl with a consistent edge.
![]() |
| Textured Turquoise Lotus Bowl |
Using Kemper's Fine Detail Cut-Out Tool (C-090-109), I cut out the lace form. I cut or pull away the excess clay between the points to minimize distortion as I remove the clay from the rest of the slab - as long as at least fifty percent of the perimeter is "free", you're pretty much good to go. I carefully remove the cut-out piece with the lace doily intact I'm ready to actually form the piece.
I've been using the Large Salad Bowl from Sasaki's Colorstone stoneware for these particular pieces - with great success. I gently "encourage" the slab down into the mold, shaping it to the sides as much as possible and minimizing the buckling of the clay. Once I've gotten the piece well into the mold, I use a very smooth river stone to further conform the slab to the mold paying particular attention to the upper edge of the bowl.
![]() |
| Frosted Melon Lotus Bowl |
Unlike most of the other bowl forms - which should be dried slowly without a fan to minimize distortion, these pieces seem to dry well in front of a fan with minimal warping. Once they're dry, I use a fine synthetic steel wool to clean up the edges, and undesirable marks from the molding process on the underside, and to soften the lace impression on the inside. This last is very important, as a glaze will only enhance any sharp edges, making an otherwise inviting, tactile piece more than a bit uncomfortable.
For bisque firing, I've been able to stack at least two high - make sure to turn each piece in a stack one-twelfth of a rotation so the points are not on top of one another to reduce stresses during firing.
For glazing, first rinse the pieces to remove any dust generated during the clean-up process. I use a 2-ounce ladle to glaze the interior, grab the piece with a pair glaze tongs, turn it over, and ladle the glaze over the bottom. Because of the size and shape of these pieces, glazing can get a bit messy - always clean up your glazing area afterwards to reduce free silica in your workspace.These pieces are glaze-fired on a large 10x15 stilt - smaller stilts can't take the weight of these pieces. I use a ceramic Dremel accessory to remove any irregularities caused by the stilts.
Because of the form of these pieces - especially the pinched tips, glaze effects are quite dramatic and pleasing. As a thank-you to Deb, I glazed a piece with Amaco's Potter's Choice Frosted Melon. I hope to give it to her at our next class.
Monday, February 13, 2012
Anniversary Sunflower
I did a post last year about a series of Deluxe Sunflowers I did for a show at the Grosse Pointe Art Association's "Word Play" show. I took a slab of clay and stamped it all over with the word "sunflower" and added some rosettes over where the ascenders ("f" and "l") rose into each line of text and used that to form the centers of three sunflowers - large, extra-large and ginormous - I was going to use to create the piece I called "What kind of flower *is* that?" It ended up being accepted for the show, a wonderful treat in a surprisingly successful year of submissions.
My friend Estela Boudreau sponsored a show of my work at her gallery in Grosse Pointe Woods, Galeria Mariposa, late last year, and we decided to feature those three sunflowers. Instead of hanging them as I had at the GPAA show, we thought it would be cool to display them on stakes, as I had at one of my garden tours. This necessitated the fabrication of a stable display stand to hold the stakes securely with no risk of tilting or any other movement.
I, of course, took this challenge to my very capable handyman, Keith Battjes, my go-to guy for everything from toilet back-ups to fashioning worktables for my studio. I hauled the three pieces and their respective stakes over to his shop and, over a couple of beers, we figured out what we needed to do. The stand was a complete success and Estela eventually purchased the three sunflowers with stakes for her "Wind Rise" retreat center near Metamora. I have the base in storage for the next similar project.
Fast forward to January 2012. My toilet has had a crisis. Keith comes to the rescue. He then asks about a sunflower as a gift for his wife for their upcoming 31st anniversary, recalling the sunflowers he had worked with previously. Luckily, he and his wife have relatively short names ("Diane" and "Keith") and, after ascertaining which name should "go on top" (his wife's of course!), I began the process of creating my first Anniversary Sunflower. Which Keith picked up today and put up in their kitchen this evening. What a wonderful project!
Please send out best wishes to Keith and Diane on their anniversary, this Sunday, February 19.
My friend Estela Boudreau sponsored a show of my work at her gallery in Grosse Pointe Woods, Galeria Mariposa, late last year, and we decided to feature those three sunflowers. Instead of hanging them as I had at the GPAA show, we thought it would be cool to display them on stakes, as I had at one of my garden tours. This necessitated the fabrication of a stable display stand to hold the stakes securely with no risk of tilting or any other movement.
I, of course, took this challenge to my very capable handyman, Keith Battjes, my go-to guy for everything from toilet back-ups to fashioning worktables for my studio. I hauled the three pieces and their respective stakes over to his shop and, over a couple of beers, we figured out what we needed to do. The stand was a complete success and Estela eventually purchased the three sunflowers with stakes for her "Wind Rise" retreat center near Metamora. I have the base in storage for the next similar project.
Fast forward to January 2012. My toilet has had a crisis. Keith comes to the rescue. He then asks about a sunflower as a gift for his wife for their upcoming 31st anniversary, recalling the sunflowers he had worked with previously. Luckily, he and his wife have relatively short names ("Diane" and "Keith") and, after ascertaining which name should "go on top" (his wife's of course!), I began the process of creating my first Anniversary Sunflower. Which Keith picked up today and put up in their kitchen this evening. What a wonderful project!
Please send out best wishes to Keith and Diane on their anniversary, this Sunday, February 19.
Subscribe to:
Posts (Atom)