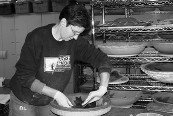
I first started taking pottery classes back in 1993 through Grosse Pointe Community Education with one of Grosse Pointe South High School's art teachers, Gene Pluhar. (Actually, Gene's first year as a teacher in the school system was my first year as a student when he was my gym teacher for first grade.) I had registered for a jewelry making class with Gene as a high school junior but ended up having to drop the class as schedule changes were required due to issues with my Math 3-A teacher. Gene, however, generously gave me time after school on a couple of occasions to assist me with a weaving project I was pursuing on my own. I had always wanted to take pottery but it had never really worked into my college preparatory schedule so, when I moved back to Michigan and ended up in an apartment in Grosse Pointe Park, I jumped at the chance to take adult ed classes with Gene in his enviably equipped classroom.
Gene taught just about every form of three-dimensional art imaginable - pottery, jewelry making, sculpture; you name it, he had it down. And his classroom was equipped in a manner commensurate with his capacities - propane torches, table saws, drill presses, sand blaster, air compresser - all in addition to the gas reduction kiln, electric kiln, jewelry kiln, potter's wheels, slab roller and large-capacity extruder usually associated with the typical potter's studio. I tried as many of the "toys" as possible - probably more than most folks, as I kept pushing the envelope, with Gene's assistance. (I still covet my own sandblaster.)
Although I worked on the wheel quite a bit and did manage to develop some competency on it, it seemed kind of... limiting to me. Hey, it was like being on the merry-go-round - it just did one thing: it went round, and round, and round, and round. So I started exploring the possibilities of the other pieces of equipment - the slab roller and extruder.
This extruder was not the small-capacity, make-a-handle extruder with which a lot of educational facilities content themselves. This was a monstrous, clay-consuming monster of an extruder: you had to feed a good 25 pounds of clay in the beast's maw to get anything out of it. But, using the large dies, you could get good-sized cylinders, octagonal cylinders and square forms you could really make into something. In addition to a series of lamp bases and containers, I made a few tool caddies which I embossed with some leaves, which I still have.
When I set up my own studio, the two things I knew I wanted to have was the largest slab roller and the largest extruder I could afford. (I don't like being limited by my equipment, as I have enough inherent limitations!) In the time I've been working in my own studio, the old bucket I used to carry my tools around really hasn't been particularly workable - especially since I now have a lot of tools. I decided to revisit the tool caddy concept using my high-capacity extruder.
To use the extruder, you attach the desired die to its underside using four large C-clamps, making sure the metal clamps holding the pieces of the die in place are inside the extruder. Cut chunks of clay and feed them into the opening, using the plunger to force the clay into the reservoir. Keep feeding the clay until it starts to come out of the bottom through the die. This is where it gets tricky. To get an upright (as opposed to curved) form, take something flat (like a small slab of wood or a small kiln shelf) and hold it against the bottom edge of the emerging clay form as you continue to use the plunger the force the clay through the die. Once you have extruded the size form you desire, carefully cut it off with a cutting wire. (This is where your placement of the C-clamps can become an issue.)
Using a cutting wire, you can then cut the form to the height you desire for the forms you are fabricating. Because my tools vary in height, I wanted shorter and taller pieces; and because I wanted to be able to see the tools, I angled my cuts as well. Once the pieces were cut to the heights I wanted, I rolled out a slab of clay, placed each cylinder on it and cut out a base for each one. Scoring and slipping the bottom edges of the cylinders and the outer top edge of each base, I slipped and affixed them to one another and worked the edges together until they looked consistent. I rolled out another slab of clay and, using a set of alphabet stamps, stamped the names of the various types of tools - "Score/Poke", "Rib/Kidney", "Cutting", "Ribbon/Loop" (two of these, 'cause I have lots), "Hole Punch" and, of course, "Miscellaneous". I cut out the forms around the lettered areas and applied each to an appropriately-sized form. (I think I have to make a second "Miscellaneous" caddy, at the very least.)
Once the pieces were dry, I used synthetic steel wool to smooth all edges and then bisque fired, as usual, to Cone 06.
To finish the pieces, I wax resisted the bottoms, stained the lettered areas, a different color for each piece, which I wax-resisted that as well. (One of the labels cracked in half for some reason but I was able to affix the broken-off section with white glue and finish the glazing process with no mishaps; the fracture is only visible if you know to look for it.) I then dipped each piece in a glaze complementary to the stain color and fired on stilts.
The result? Tool caddies that not only help me organize my tools but make my work table look pretty darned cool!
Thursday, April 12, 2012
Subscribe to:
Post Comments (Atom)


No comments:
Post a Comment