This idea was inspired by a couple things. Many, many, many years ago, I worked at a Baskin Robbins in East Lansing (Dan Wardlow owned that business as well as one on the other side of town) scooping ice cream; this was my "half-time" job complementing my full-time job as a prep-cook, sand-man, egg-man, dinner cook at Beggar's Banquet. Once I got the job down (no, it wasn't that difficult, except for the customers!), I started helping to decorate the cakes. And I got pretty good at it, over time. And it was at least a little bit more creative than most of the other stuff I was doing at the time. (There are only so many ways you can chop an onion, really.)
Relatively recently, I came across a pastry decorating set at K-Mart when Martha Stewart's relationship with that company was going strong and they had a lot of "Everyday Living" products marketed under her name. This kit was pretty comprehensive - a couple of "parchment" pastry bags, a few thinner, clear plastic pastry bags, a set of basic tips and the plastic fittings to attach them securely to the bag, a device on which to make flowers to be transfered to a decorated cake and a frosting knife. I haven't used either of the last two items but I've had an absolute field day with the rest of the kit, and have added to it over the years. (It's a good thing...)
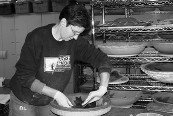
To fabricate the sunflower, I follow my typical process of forming a slab of clay (about 1/4" thick) over the mold and applying the petals. Now I'm ready to start applying the center. I take a pastry bag and attach the desired tip - for the "Cake" texture, I use a typical "Star" tip. I fill the bag with enough slip so that I can securely close the back of the bag and comfortably grip it with my hands (this last thing is important for the long haul). I try to get as much of the air out of the bag because blow-outs can really mess up the application of the slip, creating more work. Also, the slip has to be the right consistency: too wet, and it won't form up nicely; too dry and you're going to be working way too hard. (It does take a certain amount of strength to do this, especially over a large surface, so cut yourself some slack when you start out.) Starting from the outside edge of the flower's center, I apply "stars" of slip, working toward the center.
Once I've finished, I set the flower to dry until it's leather hard. It's important with this piece not to handle the center until the rosettes are pretty well set up or they'll smoosh. Once it's dry enough to handle without the flower collapsing of the center smooshing, I finish with a fitting and holes for wire and allow it to go bone dry before firing.
I like to use Amaco's Potter's Choice Ironstone (one of my students' favorite glazes, actually) on this piece for some reason. (There's a synchronistic dynamic for me in my work, associating certain forms to certain glazes and stains.) I glaze the center with Temmoku from the same glaze series (which I also use to add some more "umph" to the area where the fitting is attached to the back of the sunflower), wax resist it and then, when the wax is completely dry, pour the Ironstone over the top of the petals and then brush to completely coat the unglazed portions underneath. I fire the pieces to Cone 6 on bar stilts placed along the inner perimeter of the petals. The glaze breaks and pools from black through a buff to a brick red which enhances the dimensional quality of the sunflower, which is exactly the sort of effect I wanted.


No comments:
Post a Comment