Like a lot of people, I really like hot peppers. Not so much to eat, anymore; I lost the tolerance I developed during my two-year sojourn in Singapore some time ago. I like the colors and forms and, in fact, not unlike quite a few other people, as it turns out, I've incorporated a lot of pepper imagery in my kitchen, including framed art, cross-stitch, glass and tile.
For many years, I had wanted to make tiles for my kitchen featuring small hot peppers. I took a class with Dave McGee at Pewabic Pottery some years ago to learn the techniques of tile making but never really made anything. This winter, along with a number of other "on-hold" projects, I finally took the plunge and got down to business.
I had actually tried to make the tiles once before. I had molded the base tiles and had acquired some habanero peppers from my friends Barb and Ray Radtke. I cut one of the peppers in half (always use gloves and keep your hands away from your face when handling any hot pepper) and stuck one half on a tile, assembled the cottle boards (the four boards that are clamped together to delineate the mold), made my plaster and poured the tile.
A week or so later, I pulled the clay tile out of the mold and found... nothing. The pepper half, because it was not firmly anchored to the tile, had floated somewhere into the plaster, never to be seen again. So the first attempt aborted. But I had learned that I needed to find a way to really affix the pepper to the tile.
This winter, after my wildflower tile project (more about that in a future post) met with pretty resounding success, I decided to take the plunge. I went to Nino Salvaggio, the local market where I purchase my fruits and vegetables (among other things), and picked up two habanero, two jalapeño and two serrano peppers. I had already made twelve base tiles and had them stored, still moist. Working with one pepper at a time, I cut each in half, gutted the two halves, stuffed them with clay and then stuck each half well onto a base tile.
 |
| Habanero Pepper Tiles |
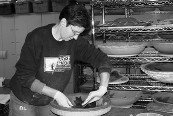
Once I'm ready to make tiles, I lay a dedicated piece of canvas on my work surface, place the mold on it and put a well-wedged piece of clay with no obvious creases so it fits well into the mold. I push the clay with my fingers to make sure the corners and edges are all well filled; then, using a good-sized rubber mallet covered with an old sock, I pound the clay into the mold. You don't have to do this for a long time - just work from the center out to all the edges one time; sometimes I go around the edge just to make sure. Fold the excess clay that has "leaked" out around the tile up and over and use a cutting wire to take it off; I sometimes use a dull fettling knife to remove any remaining excess. Depending on how you're going to use the tile, it should be scored on the back for use as field tile and/or a place(s) for a nail added to hang (Kemper Tools JA32 is good for this). I set the tile to dry and then use synthetic steel wool to do final clean up. The tiles should dry completely before bisque firing, which I do at my usual Cone 06.
 |
| Jalapeño Pepper Tiles |
If you have clean, washed kiln shelves, you can just set the tiles on the shelves if you've made sure the glaze has been cleaned off the bottom face and the lower eighth inch of the sides of the tile. Otherwise, I just pop them on 1/2" posts and call it a day. I fire to Cone 6 in accordance with the glaze requirements.
 |
| Serrano Pepper Tiles |


1 comment:
Mmmmm, those pepper tiles don’t just look hot – they’re also eye-catching, especially the habanero design. They would look good in Mexican-style kitchens since the Mexican cuisine usually includes peppers as a main ingredient. I'm looking forward to seeing other designs, including the mild pimiento and bell pepper. =)
Alana Geikie
Post a Comment