 |
| Top to bottom, Ironstone/Witch-hazel, Temmoku/Swamp White Oak, Deep Olive Speckle/Tulip Tree |
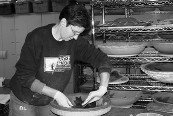
Late in 2010, Christine asked if I would be interested in doing a Hanging Bird Bowl Workshop the next Spring, as she had had a number of inquiries from customers interested in creating their own versions of one of my more popular pieces. (Right, right: They're all popular!) On the face of it, putting on a pottery workshop may seem like a simple proposition - advertise, take registration, show up, teach the class, have a (big) glass of wine, go home.
As an educator, I have always held my students' success as the most important part of the experience. One thing a teacher can do to increase the chances of student success (and customer satisfaction) is to create and maintain reasonable expectations. I felt it was important to make sure the students had a realistic idea of the process itself as well as the final product.
To this end, Christine and I spent a great deal of time discussing clay bodies (she uses clay from Runyon in Clio, MI; I use clay from Rovin in Ann Arbor, MI) and glazes. I wanted to have samples - of the final piece as well as of how the glazed surface would look, based on the glazes we finally selected. To this end, I made three samples using my clay and three samples using Christine's one of each of which I glazed with the three glazes we had selected from Amaco's Potter's Choice Series of glazes, Temmoku, Lustrous Jade and Deep Firebrick.
 |
| Top to bottom, Salt Buff/American Sycamore, Vert Lustre/White Oak, Deep Firebrick/Red Oak |
The other issue for preparation was equipment - for two sessions, on my part: fabrication and glazing. (Christine took care of the leather lace for the final assembly session.) Because we were using my plaster molds for the pieces, I had to make sure I had enough of those; that was tough, because the molds had to be made at least a week before the session so they could cure sufficiently before being used. I can't even remember how many milk crates of equipment I brought with me - sponges, rubber kidneys, containers for water, good cutting tools, scoring tools, the three (yes, three) tools required to make ladybugs, punches to make the holes for the leather lace to hang the finished pieces and slip. Not to mention the molds, the leaves stored in water, paper towel to blot the leaves dry. And, of couse, the samples. Just for the fabrication session. The second session - glazing - included water containers, lots and lots of good brushes, sponges, a selection of Mason Stains (the same stains I had used on the sample pieces, in order to better manage those expectations) and two Amaco High-Fire Glazes for the ladybugs; Christine supplied the main glazes.
And lots of rest.


