Wednesday, December 9, 2015

6th Annual Black Cat Pottery Holiday Open House

We're getting down to the wire getting ready for the 6th Annual Black Cat Pottery Holiday Open House. We'll be getting the studio (which is unbelievably dusty - unless you're a potter) cleaned up and prepped for the event tomorrow with the help of my good friend and Official Left Hand Theresa tomorrow and many of the vendors will be setting up Friday afternoon and evening. I'll be heading out to secure the ingredients for our traditional mulled cider and any other odds and ends so we'll be ready to welcome you all at 10:00am, Saturday, December 12. In the meantime, I wanted to take a moment to remind you of the great vendors we'll be featuring for 2015.

We are always delighted and privileged to open our studio to Don Schulte of Notable Greetings. Don and I met eight years ago; since then, we have become the best of friends and ongoing collaborators. Don, who is a graduate of the College of Creative Studies, has his own photography business, providing services for corporate clients as well as local and regional publications. He also shoots frequently in my garden, including images of butterflies, traditional garden favorites and, most especially, Michigan wildflowers. Don will once again feature his lovely notecards and fine art prints, including the debut of his newest set of Michigan Wildflower Notecards, Spring 9, including images of Swamp Buttercup (Ranunculus septentrionalis), Wild White Indigo (Baptisia alba), Rattlesnake Weed (Hieracium venosum), Early Virgin's Bower (Clematis occidentalis), Red Honeysuckle (Lonicera dioica) and Virginia Waterleaf (Hydrophyllum virginianum).


2007 was a very good year: I not only met Don; I also met Chris Hopp of Farmbrook Designs, another "best of" friend and collaborator. Chris - who is self-taught - takes humble bags of Portland Cement, Peat Moss, Vermiculate and Perlite and turns them into amazing garden and home decor. From candleholders and block letters (you can spell out all sorts of cool things with these!) to gorgeous, one-of-a-kind fountains and troughs. His garden pieces - including lanterns and planters - are frost proof and designed to withstand our severe seasonal fluctuations with aplomb. I particularly like one of his more recent designs - his columnar candleholders - which work beautifully in both formal and informal settings.


Returning for her second year, Eve Hyde of E.H. Knits brings her lovely knit creations. I met Eve less two years ago at an artists market and immediately connected with her - at least partially because of her delightful Catnip Mice. Eve's talents with needles and yarn yield warm and wonderful results, from whimsical children's hats and sweaters to daring fashion statements for us grown-ups. Eve uses the finest materials in her work, guaranteeing years of enjoyment: Hers are definitely "Happy Knits for Happy Humans". But my favorites are those mice - one for each kitty, please. Being a cat lover myself, I have a lot of cat loving friends; so, get to the Open House early if you want to bring one of these lovelies home for your resident fur person!


Also returning for the second year, Green Mitten Jam specializes in locally-sourced ingredients for their unique take on toast toppings. Focusing on small batches using the very best seasonal ingredients, Megan and Josh have created a delectable new take on preserves. I can personally vouch for the Peach Melba, Red Haven Peach and Mango Cardamom but don't take my word for it: stop on in and sample everything to decide which are your favorites to take home or gift (buy extras just in case). Due to seasonal availability of local produce, we're never really sure what exactly Megan and Josh will be bringing - it's always a treat, though!


Joining us for the first time, Debbie Groat of Saverine Creek Heirlooms has been my host on my travels to Midland more times than I can count, opening her home and feeding me the best meatloaf and chicken and biscuits I've had since I left home. Really. Debbie makes beautiful jewelry using heirloom and exotic seeds, many of which she grows herself, as well as semi-precious stone beads. (She's also a champion home-canner who has introduced me to the delights of Corn Relish and Dilly Beans, among other yumminess.) Debbie's attention to detail is expressed in every one of her designs, from a spare pair of earrings to a complex multi-strand necklace. Each piece is hand-made, from selecting and drilling each seed to mounting, resulting in one-of-a-kind conversation pieces to complement jeans or an evening ensemble.


Since 2011, we have featured a local author at our Holiday Open House. This year, we are pleased to welcome Anita Pinson, who will be sharing her new children's publication, Voices Across the Lakes: Great Lakes Stories and Songs. Anita - a music teacher as well as an author - combines original stories with genuine songs, creating a narrative that defines the Great Lakes States. Anita will be signing her book - the perfect gift for that favorite child or grandchild - during the open house.


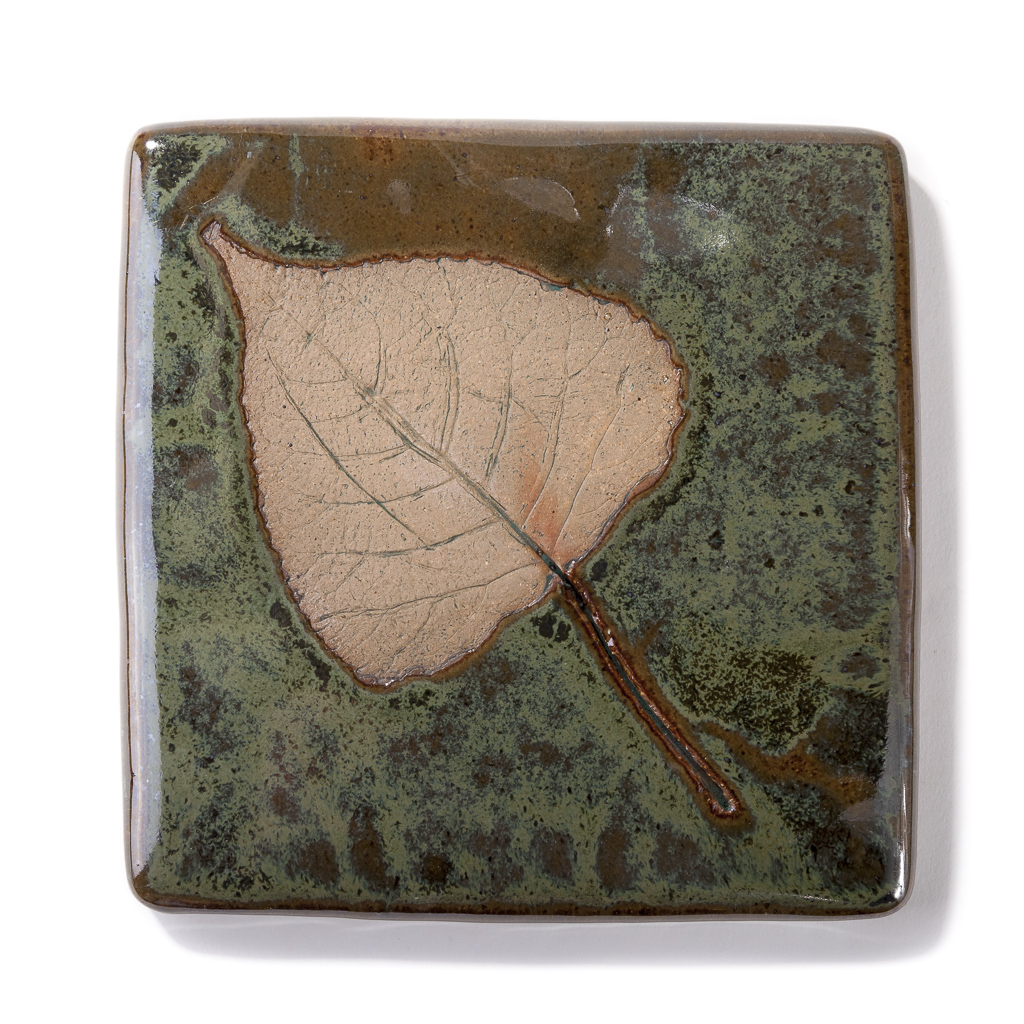
And, of course, we'll have Black Cat Pottery products as well, including our new Winterberry Serving Suite - bowls, trays and other designs perfect for entertaining all year long.


Hope you can join us!

Thursday, November 5, 2015

Winterberry Serving Pieces

Set of four 4" Coasters
Although I am not particularly inclined to celebrate one winter/year-end holiday over another (except, perhaps, the Saturnalia), I do like to celebrate the seasons of the year. One of the most trying periods of my life was my nearly-two-year sojourn in Singapore - where the sun came up at 7:00am every single day and went down at 7:00pm every single day; and where the weather report inevitably consisted of "Temperatures will be in the low 30s (Celsius) with scattered showers throughout the island." One wondered why they even bothered. (Granted, in November the showers were less "scattered".)

Pair of Trivets (6" and 8")
I grew up in the northeastern and midwestern United States, where we have a full four glorious seasons. In Michigan, in fact - being part of the high midwest, we have some of the most extreme weather in North America, spanning sometimes 100º (Fahrenheit) in less than 12 months accompanied by epic snows, devastating droughts, punishing thunderstorms and the odd tornado or two. (As well as some earthquake aftershocks....) And, although I have my favorites, I appreciate the seasonal cycle. (My favorites - Spring and Fall - are rendered more favorite by the not-so-favorites - Winter and Summer.)

Tiny, Small, Medium and Large
Winterberry Bowls
So, Winter is not my favorite season. But I have learned to appreciate it as a time for stillness and quiet (snow is a great sound insulator), especially as opposed to the other three seasons of the year, burdened as they are by a race to get the garden ready, the struggle to keep the garden looking good and the race, once again, to put the garden to bed (among other things).

Winterberry Spoon Rest
Recently, a mentor strongly advised me to develop some seasonably-appropriate pieces for Winter and, despite my personal resistance to her admonition, I did so. I decided to use as an inspiration my Applied Leaf Bowls and Trays, as well as our own Michigan Holly (Ilex verticillata), a deciduous, heavily-fruiting holly also known as Winterberry. The results are as you see here.

Square Winterberry Tray
I've used the same molds for the bowls and trays as I use for my Applied Leaf Bowls and Trays. (I will be posting on the other pieces in that series over the next few weeks.) These initial samples utilize a plain, untextured coil for the branches; upon further research, I discovered that Winterberry twigs actually have visible lenticels, so I am now using a metal grid to create a more accurate texture for the twigs on the bowls and trays.

Square Winterberry Tray with
Tiny Winterberry Bowl
Probably the most demanding aspect of these pieces, as opposed to their "leaf" predecessors, are the berries, each of which is individually cut (I learned long ago that the key to making consistently-sized seeds or berries is using a half-inch round clay cutter and a thin slab), rolled, scored and slipped into place. Three coats of Scarlet Red Amaco HF-165 are required to get a good color to contrast successfully with the Amaco Potters Choice Vert Lustre glaze used for most of the piece (With 30 "berries" on each of the three largest trays and smaller quantities on the other pieces in the series, I go through a lot of berries....)

Winterberry Dessert Tray
Winterberry Dessert Tray with
Tiny Winterberry Bowl
All pieces are food safe as well as dishwasher safe. I'm willing to bet they're also oven safe, as they're fired to over 2200ºF. The pieces are modular, so bowls and trays can be used separately or in various combinations. The Tiny Winterberry Bowl works well with all four trays, converting them into highly-functional "chip-and-dip" servers without the burden of washing and storing an otherwise cumbersomely-designed, limited use serving piece. The Small Winterberry Bowl can used with similar ease with both the Oval and Rectangle Trays.

I'm hoping to come up with some figured trivets and coasters for next year, as well as, perhaps, a round tray, a wine-bottle coaster and, maybe, a toothpick holder. I'm definitely open to suggestions so as to develop a truly comprehensive range of serving pieces that are not only suitable for the holidays but for the entire Winter season.

I am pleased with them. I hope you like them as well.

Oval Winterberry Tray
Oval Winterberry Tray with
Tiny Winterberry Bowl


Oval Winterberry Tray with
Small Winterberry Bowl
Rectangle Winterberry Tray with
Tiny Winterberry Bowl

Rectangle Winterberry Tray


Rectangle Winterberry Tray with
Small Winterberry Bowl


Sunday, October 25, 2015

Leaf Serving Pieces II: Tiles/Trivets


Six-inch Silver Maple
Tile/Trivet
Back when I first started making Spoon Rests, I also made complementary Tiles/Trivets to go with them. These were flat pieces with embossed leaves - like the Spoon Rests -  that could either be used flat to protect your table from a hot or damp dish or hung on the wall as a decoration. (As I've said for years, I grew up with a very rigid and controlling family; I'm still rebelling by being as versatile and flexible in my art as possible....) When I first started making these, since I had not yet taken a tile class and so had not learned how to make and use tile molds, I would work directly from a clay slab.

Six-inch Eastern Redbud
Tile/Trivet
Rolling out a half-inch-thick slab of clay on the slab roller, I would scrape the canvas texture away with the flat side of a metal kidney (sometimes following this up with a quick roll with my rolling pin), place a leaf (vein side down on the clay - this is very important) on the smooth surface and roll the leaf into it. Using my six-inch tile cutter, I'd cut around the leaf to make the tile/trivet.
Six-inch Eastern Cottonwood
Tile/Trivet

The difficulty was getting a good clean release from the tile cutter. All too often, the clay would stick on part of the device and release unevenly, warping the tile/trivet in the process. Since I hadn't learned about using scrap drywall to dry my flat pieces more evenly (even stacking dry wall with more tiles or other work on top, in a tower of tiles and other pottery), the warping might not be corrected as the piece dried and was bisque and glaze fired; clay has memory and, sometimes, it can be pretty tenacious. I sold quite a few of those pieces - both individually and in sets with a spoon rest - but I was never completely happy with them. I finally stopped making them.
Eight-inch Northern Catalpa
Tile/Trivet

Fast forward a few years and my Hanging Bird Bowls have evolved into, among other things, Applied Leaf Bowls and, earlier this year, Applied Leaf Trays. (I'll be doing posts on those shortly.) On the advice of my mentor, I decided to put additional pieces to assemble a comprehensive series for serving use at the dining or buffet table. Reviving the Spoon Rests and Trivets seemed obvious.

Eight-inch Common Witch-hazel
Tile/Trivet
In the interim, I had taken a tile-making class with David McGee at Pewabic Pottery. (David is an excellent instructor as well as a uniquely talented artist in his own right. I would encourage anyone interested in learning about pottery in general or in tile making specifically to take at least one class with him.) I learned how to design master tiles as well as how to make molds of those masters in order to take a design into production.

Eight-inch White Oak
Tile/Trivet
The challenge with these sorts of leaf designs is that, if you were to make a mold of an embossed leaf tile, the design is so subtle and has so little relief that, in pounding out the tile, you get "echoes" of the leaf rather than a clear image, which doesn't make for a particularly satisfying design. So, I've made a blank master mold and place a leaf into the mold (in this case, vein side up so it will be against the clay surface) each time I make a piece. The down side is that, for some leaves, you can only get one impression; the up side is that, even if you can re-use the leaf, each piece is unique as recreating the exact placement is essentially impossible. I insert hanging divots in three places in the back of the Tile/Trivet so the leaf can hang either square (with the leaf's tip pointing to the upper right or the upper left) or as a diamond (with the leaf tip pointing upward).

Once dried, cleaned up and bisque fired, the pieces are finished in my typical fashion, using a water-based stain on the leaf and drawing the excess off with a damp sponge to bring up the veins. Wax resist is applied to the leaf (I also use it on the backs of my tiles - it's just easier for me to do that rather than clean off glaze) and allowed to cure. I then glaze the piece, wiping the edges so they don't drip. I fire to Cone 6 with a 40-minute hold. The Tiles/Trivets are food safe and heatproof.

Sunday, October 18, 2015

Leaf Serving Pieces I: Spoon Rest

Silver Maple Spoon Rest
It's been almost a year-and-a-half since my last post. My apologies for my long-term absence; it's been a tough time but I'm starting to get back to my normal. So, I thought I'd just plunge back in and start with a blog post. Finally.

Northern Catalpa Spoon Rest
I've been working on a series of pieces for a wholesale website and, in the process, returning to some (very) old designs as well as taking some more recent ones to a new level. I've been developing a collection of serving pieces based on my Applied Leaf Bowls and, in that context, revisiting some pieces I had stopped producing, having realized they worked well with my new direction.

Eastern Redbud Spoon Rest
Common Witch-hazel Spoon Rest
The spoon rests are one of my earliest leaf pieces, inspired by my friend Rebecca who asked for something she could use on her stovetop. I had been using leaves fired with a stain to bring up the texture of the veins but she wanted something with some glaze and a more consistent shape. I came up with a pie-piece (actually, about 120 degrees, or a third of a circle) that I formed it into one of my small bowl molds, embossed a leaf into it and added a small clay branch. The key is to make sure any canvas texture is smoothed away from the surface before embossing the leaf; emboss the leaf with a smooth stone rather than a sponge, which would pull clay away from the surface and not push the leaf into the clay surface consistently.
Eastern Cottonwood Spoon Rest

After drying, the piece is cleaned up (synthetic steel wool is great for this; I save the accumulated clay dust and recycle it with the rest of my waste clay) and bisque fired to Cone 04 or 06.

White Oak Spoon Rest
Glazing follows the same process I use for all of my leaf and branch pieces. I use burnt umber solution to stain the branch, pulling the excess away with a damp sponge. Then I stain the leaf (I have a "key" I've developed that tells me which stain and glaze combination is used with a given type of leaf) and, again, pull the excess away with a damp sponge to bring up the leaf's veins. Both surfaces are treated with wax resist and, after curing for several hours, dipped in the appropriate glaze. I fire on stilts to Cone 6 with a 40-minute hold.

Although designed as spoon rests, they also work as soap dishes, change stashes, jewelry dishes, tea-bag rests and candle holders. All are food safe and can go in the dishwasher.