Had a wonderful trip to South Bend, Indiana, and other locations Thursday and Friday.
Dropped off work to CircaArts Gallery in South Bend, where I met Kathy, the owner, and her supervisor, Zoe the long-haired black-and-white kitty, who gave me a much needed feline fix and seemed to approve of me; you can see a picture of her overseeing Christmas decorating on their Facebook page. Then it was up to South Haven, Michigan, and a stop at the South Haven Center for the Arts, where I met young Phoenix, a young all-black lady (about four months old) who loved to stand up on my shoulders and lean into my head as she looked out the window - another much appreciated feline fix.
Then I headed toward Kalamazoo where I stopped at Hidden Savanna Native Plant Nursery to see my friend Chad and pick up some American Beech, Dwark Chinkapin Oak, Black Oak and Sassafras leaves with the help of his four-year-old son, Henrik. Then I dropped work off at Nature Connection Kalamazoo with my friend Laurie Russell, stopped at the Expo Center to visit with my friend Cleve Hayes of Puddingstone Farms, then finally to my friends' Bob and Julie to for some great food, great talk and a very comfortable bed.
Friday I "did" Ann Arbor (as much as I "do" Ann Arbor), with stops at Rovin Ceramics for 500 pounds of clay, my friend Carol's to share some pottery with her (where I met her Siamese Saatchi, who is the first cat to remind me of my trans-species soulmate, Gus), the The Ann Arbor Art Center to drop off work with Amy and meet Nathan, picking up some more Cherry Republic Barbeque Sauce and seeing my friend Jill and replenishing my stock of 18-year-old Balsamic Vinegar and Fused Meyer Lemon Olive Oil at Fustini's Oils and Vinegars. A good trip!

Saturday, November 23, 2013
Tuesday, October 15, 2013
Fall(ing) Leaves I: Tilia americana (Basswood)
 |
| Tilia americana (Basswood) |
Considering that we're well into Autumn now, I thought I'd "crib" from my Facebook page and do a series of posts on "Fall(ing) Leaves". with some photos of some leaves I've done as well as some information about the plants they represent.
We're going to start off with Tilia americana, American Linden or Basswood. This is the native relative to the oft-seen Little-leaf Linden, or Tilia cordata. This species favors moist woods - nearby they can be found at the Environmental Interpretive Center at U of M Dearborn. Shorter than the European species, they top out at about 80 feet and have the broadly columnar form common to the genus.
They are among the latest blooming of our native tree species and are often referred to as "bee trees" for their fragrant, nectar-rich flowers, which hang pendulously to protect the precious nectar from being washed away by early summer storms. The flowers and the rounded, woody, pale gray-green nut-like fruit are joined to a pale green bract. The dark green leaves (paler underneath) are broadly ovate to cordate (heart-shaped) with serrated margins and are, at six inches in diameter, twice the size of the European species.
I collect most of the leaves I use, although there have been occasions when folks have generously "donated" leaves, which I always appreciate. Some leaves need to be used fresh, while others can not only be re-hydrated but even reused (oaks are especially resilient). Basswood leaves are on the delicate side, so I try to use them before they dry out.
There's a great deal of synchrony in my work in that I strongly associate certain colors - both stains and glazes - with certain types of leaves. I'm also constrained in my choices by a limited range of stain colors - especially as my (somewhat rigorous) aesthetic requires that I use stain colors that are somewhat close to a color the leaf would be at some point in its annual cycle. Because these leaves are relatively dark, I decided to use my Green - Peacock Mason Stain and combine it with Amaco's Potter's Choice Blue Rutile. The combination has been very popular - these leaves generally walk out the door.
Monday, May 6, 2013
2013 Annual Spring Garden Tour
 Saturday, June 1, 2013, 10:00am-2:00pm
Free and open to the public!
The Gardens. Cheryl's life-long love of Clematis and more recent obsession with native plants are both immediately apparent as you arrive at the property. Designed as an educational space rather than a design show-stopper, the gardens include dozens of Clematis, representing over 10 species as well as large-flowering hybrids, and over 200 species of native plants, ranging from Spring ephemerals to large trees - all nestled in a typical 40x120 urban lot in the heart of the Motor City. Become acquainted with some of the lesser-known small-flowering species Clematis varieties and the beauties of our native flora, as well as cost-effective sustainable gardening strategies.
.JPG) Cheryl's garden was featured in the July 2009 issue of Michigan Gardener and she penned the first article on native plants to appear in that publication, in May 2012, as well as her most recent article on Clematis which appeared in that publication's April 2013 issue. She has another article on natives slated for 2014.
Cheryl's garden was featured in the July 2009 issue of Michigan Gardener and she penned the first article on native plants to appear in that publication, in May 2012, as well as her most recent article on Clematis which appeared in that publication's April 2013 issue. She has another article on natives slated for 2014. Everything Else. We also feature local garden art, live music and refreshments, as well as two hands-on workshops. Last year's Hypertufa Planter Workshop, led by Chris Hopp of Farmbrook Designs, was a huge success, so we'll be offering it again. Guests will also have the opportunity to work with local artist Christine Laikind to create a unique botanical monoprint using materials from the gardens. (There is a charge for the workshops. The rest of the event is free and open to the public.)
The 2012 Summer Garden Tour was a great party, with over 100 folks enjoying the gardens, art and entertainment - we hope you can join us to make this event even more fun and exciting.
All events are at 3903 Grayton St., Detroit, MI 48224. Contact Cheryl at cenglish@blackcatpottery.com for additional information about the workshops. Register online using the buttons to the left.
Friday, April 12, 2013
Garden Show at Midtown Gallery, Kalamazoo
Finally got some pictures of my work on exhibit for the Garden Show at Midtown Gallery, at 356 So Kalamazoo Mall in Kalamazoo. The show is up through April 27 and there is some truly wonderful art to be seen, including metal sculpture, photography and acrylics, among other media. I love how the show was hung, so the various artists' work could complement one another. Be sure to check it out and give a shout out to Terry!
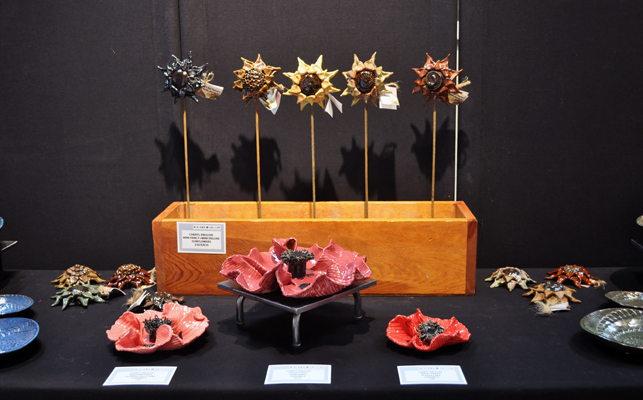
First Row, left: Eastern Cottonwood Leaf Basin (left); Eastern Redbud Embossed Leaf Bowls (right).
First Row, right: American Beech Embossed Leaf Bowls (left); Eastern Redbud Basin (right).
Second Row: Rosette Pillow Vases.
Third Row, left: Clytie (top); Large Sunflower Leaf (bottom).
Third Row, right: Clytie's Son (top); Large Eastern Cottonwood Applied Leaf Bowl with Brake Disk Charger (bottom).
Fourth Row: Lace Bowls (far left and far right); Poppies (front center); Mini Sunflowers (back center).
Fifth Row, left: Deluxe Large, Extra-Large and Ginormous Words Sunflower Installation.
Fifth Row, right: Scrolled Libation Bowl with Stand.


The Seven Deadly Sins: Gluttony - Part 4
It was time to "put it all together". I had everything done (except the door pulls, which were being glaze fired) so I decided to go ahead and assemble what I could. First I laid everything out - the cabinet and its doors and hardware, the mask and the nameplate and three drywall screws.
 When I first started working on The Seven Deadly Sins concept, I had made some name-plates for the seven cabinets, rolling out a slab of clay, using my Poetry Stones Kit letters to stamp out the seven sins and punching holes for screws to affix them to the cabinets when the time came. I had finished these by reserving out the letters and glazing the rest with crackle white glaze and raku firing them; they had been in storage for over ten years, waiting for me to finally get back to the project.
 I had also thrown a doorpull master all those years ago, of which I finally made a bi-valve mold this Spring. After making two casts from the mold and letting them harden a bit, I incised them with what I hoped might look like a rotting apple (if you really used your imagination) and made holes to take threaded inserts for screws to affix to the doors. I bisque fired them to Cone 06. After firing (and determining that they would work with the inserts), I applied black glaze to the tops, pulling off the excess so the glaze only remained in the incised areas; then I glazed all but the bottoms with my Pearl White glaze - tying them back to the nameplates I had made all those years ago.
 My first step was to attach the doors to the rest of the cabinet using the tiny little hinges my handyman/friend Keith had given me. Then, using black drywall screws (which looked perfect with its raku finish), I attached the nameplate at the top center inside the cabinet. I had to do this very carefully because the plaque was not perfectly flat and if I screwed it down too tightly on both sides, it could easily crack; so, using a small cordless screw driver, I worked very slowly and checked frequently to make sure it was tight but not too tight. The screws were much too long, of course, so I marked them after I drilled them in, then took them out and cut them off using a pair of bolt cutters. This way, they firmly held the nameplate in place without extending beyond the back of the cabinet, which would have created considerable problems when installing the piece.
 With the cabinet sitting up, I figured out where I wanted the mask to sit, then measured how far down from the top of the mask the wire would stretch when the piece was hung inside the cabinet. Measuring to the center and then three inches down from where I wanted the top of the mask to rest (the distance between the top of the mask and the wire), I drove another drywall screw in at an angle. After making sure I liked how the mask was oriented, I took out the mask, removed the screw, cut it down so it would not extend beyond the back of the cabinet, then replaced it.
When the doorpulls were fired and cooled, I placed them on the outside of the doors. I marked and drilled holes, then put the screws through and put the threaded inserts on them. After making sure that the doorpulls were going to look right and work correctly, I filled both with epoxy and put the over the inserts and screws, making sure the "rotten apples" were correctly oriented.
 I thought the piece was "done". I was actually pretty happy with it - the contrast between the innocuous exterior and the excess of the interior was working for me. My best friend, Catherine, came over to go out to lunch (she had generously offered to treat me to celebrate the successful refinancing of my house here in Detroit) and she was the first person to see the finished piece. Despite the fact that she protests that she lacks any creativity, Catherine made the suggestion that I put a knife and fork at the bottom of the piece to balance the nameplate at the top, further suggesting that they be crossed so as to be reminiscent of the crossed bones indicating "Poison". Since we were going to the local diner to eat, I asked our waitress (and friend) if we could buy a knife and fork. Although it isn't in any of the pictures here - we dropped the piece off for jurying for the Grosse Pointe Art Center's "Food for Thought" show right after we finished eating, it really finished off the piece.
Keep your fingers crossed that the piece gets in the show. I actually feel it's one of the best pieces I've ever submitted. The description of the show refers to our "ambivalent relationship with food" and I think this piece does a decent job of capturing just that.
The Seven Deadly Sins: Gluttony - Part 3

Well, Keith did that and more. In the intervening years, the boards had warped, so he took the back off the box, used the boards as a new back, and hinged the still-(relatively)flat boards as the new doors. Using almost unimaginably small hinges as well as some picture wire and small staples, he set me up.
I knew I wanted to use pictures of pasta dishes for the inside of the cabinet. I found an Italian recipe magazine at my local market that had photos of 13 pasta dishes; unfortunately, the photos were almost all back-to-back, so I had to get two copies of the publication - at $12.99 a pop (the things we do for our art). But the pictures were exactly what I wanted.
 I stained the entire exterior, all of the edges and the inside top and bottom of the cabinet using Minwax Ebony Stain. Once it was completely dry (and the house aired out), it was time to work on the interior. I tore out all the pasta recipe pictures (I didn't want to cut anything because I wanted to have the softer torn edge), then - using a good metal ruler - tore off any excess white space in the images; I wanted as much of a riot of color as possible inside the cabinet. I roughly placed the pictures I wanted over the doors and inside the cabinet (I wanted pictures with red sauces to be more prominent to pick up the colors in the mask) and started applying them using Mod Podge, a product I remembered from my childhood.
 In the process, I discovered it was best to apply the Mod Podge to the paper using a one-inch-wide flat brush, flip it over and apply it to the desired surface and then move it into position. Using a barely-damp sponge, I smoothed the paper (as much as I could on a very rough wood surface), pushed the paper it into any corners and removed any excess Mod Podge from previously applied paper surfaces.
I did the doors first and let them dry completely before trimming them with a sharp knife - I wanted to carry the excess over into the inside of the cupboard. Because the doors were a bit longer than the interior (in order to completely cover the box), I trimmed the bottom and top images off to register as closely as possible when the doors were opened. I had one extra image, which I tore into quarters and applied randomly inside the cabinet. Then I let the piece dry over night.
It was time for final assembly.
The Seven Deadly Sins: Gluttony - Part 2
 |
| Mask, Bisque Fired |
Once the mask had cooled sufficiently, I brought it in and started glazing it. I knew it was going to be a multi-step process: glaze sauce (three colors); wax resist pasta and sauce; stain (and nuance) meatballs; wax meatballs; finally, glaze the rest of the face.
Working methodically, I applied three coats of Amaco Celebration Series Scarlet Red to all of the sauce areas (photo below, left). (It helped that I had other things to do in the studio, including glazing some ladybugs on a commission toad house Scarlet Red and Black, it also helped that I had a fan I could put on the piece to speed up the drying, as well as the fact that I had forgotten an appointment, which gave the piece additional time to dry between coats.) I knew I didn't want the "sauce" to be the same color - nothing is really all the same color, after all. So, after applying the Scarlet Red and letting it dry completely, I added dabs of Burgundy from the same glaze series (photo below, center) and, finally, dabs of Clementine, also from the Celebration glaze series (photo below, right).


 |
| Mask Waxed |
 |
| Mask Glazed |
 |
| Mask Glaze Fired |
I fired the piece on a four-hour cycle at Cone 6 on four stilts. I was delighted when I opened up the kiln and saw the final results. "Gluttony" was shaping up very nicely....
The Seven Deadly Sins: Gluttony - Part 1
 |
| James's Face |
I'd be fooling myself (and no one else) if I thought there was no correlation between my father's recent demise and the birth of this concept. I was in a pretty morbid (in a lot of ways - personally, professionally, psychologically) place in my life - and what does any artist do with that sort of stuff?
Anyway, I started working on this idea in 1996, while I was working at a place called IRI, where I met my now-good-friend James, who was the company's IT person and, in addition to being rocky smart, culturally attuned and utterly devoted to his family, weighed, well, quite a lot at the time.
 |
| Part of the Extruded Pasta and Meatballs |
 |
| The Pasta Finished |
Needless to say, I did make a cast of James's face; you can see the piece I pulled from it in the top picture here. I went ahead and used my Rovin RO-23 Peach Stoneware for the face itself because I planned to use an opaque glaze from my first pottery teacher and I prefer this clay for most of my work. I also planned to use that clay body for the "meatballs", as I planned to stain them using Burnt Umber, for a different type of matte finish. After cleaning up the face and putting in holes from which to hang it once the piece was finished, I began the process of adding the "pasta", "meatballs" and "sauce".
 |
| The Mask, Completely Fabricated |
The final touch was going to be the sauce. Using a pastry knife, I slung clumps of semi-liquid white stoneware slip slip at
the mask, randomly hitting it all over the pasta and exposed "skin". I made quite a mess all over my work area (including the floor) but I loved the effect - it conveyed the unbridled energy I was driving for as successfully as I could have wished.
Once I had made sure the hanging holes had not been covered in the fabrication process, I set the mask to dry, then bisque-fired it to Cone 06. Now it was ready to be glazed. I had been (relatively) careful about documenting the process, partly to include on this blog but also because I wanted James to see what I had done with his face. I actually saw him later on the day I fabricated the mask. He had had surgery in the intervening years and it was truly amazing to see how great he was looking - and he liked what I had done with our concept.
Sunday, March 31, 2013
Black Cat Pottery Southwest Michigan Tour
 |
| Before |
As you can see to the right, that's what the car looked like before loading in the cats to go for boarding, let alone my personal effects. I guess it could have been a bit more full, but not much more! (Good thing my friend Chris Hopp decided to do his own delivery to Midland - I really don't think his work would have fit!)
I headed out shortly before 8:00 am on Thursday to drop the kitties off for their overnight at Harper Woods Veterinarians - getting the cats ready to go is a military maneuver in itself! Then, it was off to Midland. I had four stops to make. I arrived around 10:00am and rendezvoused with Jeanne Calkins, who had messaged me the day before, lamenting her failure to acquire one of my pieces while I was in the area over a month ago and inquiring when I would next be in town - perfect timing, as I was able to personally deliver the piece she wanted. Then, it was on to Serendipity 181 to drop off work for the upcoming garden show and spend a few minutes with Mary Moore - you're going to see a lot of different work there, including Toadstools, Cat Tails, Clytie Masks and Deluxe Sunflowers. Then, on to Monique Scott's to pick up the quilt I had dropped off some weeks before - Monique was good enough to put the binding on a quilt I had pieced (another person did the quilting) in exchange for some pottery.
I had hoped to meet with my friend Debbie Groat for lunch and had brought some empty canning jars with me in anticipation of doing so - but she was in Standish at her grandson's school for a special reading day. (The principal was up on the school's roof in a super-hero outfit, reading a book for the students - something not to be missed.) Luckily, my Master Gardener friend Susan Gaul was available, so we met at the North End Deli for some gyros and homemade ships before I headed off to Saugatuck.
 |
| Partial View of the Quilt |
Chuck was ready for me and we exchanged some pieces from last year's stock and loaded him up with Deluxe Sunflowers and some fun Wild Sheep and Farm Animal Tiles before heading on for Kalamazoo.
I had two stops to make once I arrived. Midtown Gallery is having a Garden Show (see my previous post) opening April 5, running through April 27. I unloaded all the work so Terry (Nikil) can set it up one the previous show comes down. Leaving my car in his parking area, I headed across the street to Nature Connection Kalamazoo to meet with Laurie Russell and to stock her up with some leaves (including some very special Sunflower Leaves), Toad Houses, Fairy Houses and Michigan Tiles. In discussing current projects with her, she suggested I talk to Terry about my concept for The Seven Deadly Sins (I'm working on "Gluttony" for the upcoming "Food for Thought" show at Grosse Pointe Art Center). On my way back to my car, I did just that - and it looks like I'll have a place to show that piece once I get it done - so now I have more work to do!
Finally, the end of my day took me to my friends' Julie and Bob Peterson, where I was fed like a queen (dinner was planked salmon with mango avocado salsa, homemade risotto, salad with a delicious baked apple for dessert; breakfast a delicious egg scramble with leftover salsa for breakfast) and slept like a stone. It was here that I was finally able to open up the quilt and get a look at it. (Monique did a beautiful job finishing what I had started four years ago....)
 |
| After |
When all was said and done, this is how much was left after the trip (deducting the clay and bins that were returned from previous deliveries). Needless to say, it was pretty cool how the car got lighter, and lighter, and lighter as the trip went on...!
Saturday, March 23, 2013

Wednesday, March 13, 2013
Brake Disk Charger Part IV: Small(er) Leaf Form Bowl with....
 |
| Small(er) Leaf Form Bowl with Brake Disk Charger |
I tried all four pieces out on the brake disks I had. The two largest pieces - the Applied Leaf Bowl and the Large Leaf Form Bowl - really worked with the size of the disks best; the other two pieces were still a bit diminished by them and I wanted a good balance between the two elements. The tension between the delicacy of the bowls and the massive form of the brake disk turned into a brute domination of nature with the smaller pieces.
Having made my decision, I took the disks back outside and cleaned their undersides with a wire brush, being careful to preserve all the rust and accumulated detritus on the upper surfaces. I took them to the gallery for in-take using gloves (to keep my hands relative clean), bringing along a square of rubber drawer liner to protect whatever surfaces they might sit on during the jurying process. I figured, with two relatively similar pieces, one of them might get in.
 |
| Brake Disks Quietly Rusting in the Back Yard |
With the success of these two pieces, I've scavenged another 18 brake disks, at least 2 of which are perfect for the 2 smaller pieces, that are now rusting to perfection in the back yard. The Large Applied Cottonwood Leaf Bowl with Brake Disk Charger will be part of an upcoming Garden Show at Kalamazoo's Midtown+Metropolis Gallery. This is a design that may have "legs"!
Tuesday, March 12, 2013
Brake Disk Charger Part III: Embossed Cottonwood Leaf Bowl with....
 |
| Embossed Cottonwood Leaf Bowl with Brake Disk Charger |
I decided to focus on three basic designs, with two variations on one of those: Large Applied Leaf Bowl, which is based on my Hanging Bird Bowl design; Embossed Leaf Bowl, a design I generally produce nested sets of four; and two Leaf Form bowls, in which the leaves themselves determine the bowl's shape - one larger and more irregular than the other.
I had to make a new mold for the Large Applied Leaf Bowl design - I had been intending to add that to my repertoire, having already added Tiny and Medium sizes to the original Small Applied Leaf Bowl. Otherwise, I used the large Sasaki Colorstone Stoneware Salad Bowls I had previously acquired as my molds for the other three pieces. (The Large Applied Leaf Bowl mold is made by humping a clay slab over a plaster mold of the center of the Sasaki Colorstone Stoneware Salad Bowl, so all four pieces had approximately the same contour.) The larger Leaf Form Bowl extended beyond the edge of the form and had a more irregular shape, much like a piece I had made in 2011; the smaller Leaf Form Bowl conformed to the mold fairly strictly, resulting in a more formal piece.
All the pieces fabricated, dried and sanded (I sand all the edges using synthetic steel wool before bisque firing to make the pieces more pleasant to handle) and bisque fired, I prepared them for their final firing using the Sea Green Mason Stain (and, in the case of the Applied Leaf Bowl, Burnt Umber for the branch) and Vert Lustre glaze, popped them into a small kiln all by themselves and crossed my fingers that at least two would be acceptable.
Because, of course, I was out of time to do anything else....
Monday, March 11, 2013
Brake Disk Charger Part II: Large Cottonwood Leaf-Form Bowl with....
 |
| Large Cottonwood Leaf-Form Bowl with Brake Disk Charger |
It would have been nice if i had been able to take an existing piece and use it and I did try to do that. But these were pretty big disks - my handyman, Keith, informed me they had probably come off a pick up or mid-sized SUV, something along the lines of a Ford 150. My medium Applied Leaf Bowls (the largest I was making at the time) all but swam in them - the relative proportions were just not right. So I made a mold for a large Applied Leaf Bowl to see how that would work.
I also knew that it was going to be a good idea to have a back-up plan. For past shows, having an alternative concept or project going often helped - just in case Plan A was unworkable or something fatal happened in the kiln. So, although I only had two brake disks, I decided to make four pieces. I figured I had at least a 50% chance of half of the work surviving and, if all four made it to completion, I could cherry-pick the two I preferred.
Then I had to figure out the particular designs I wanted to use. For sanity's sake, I've developed a comprehensive matrix for my leaf pieces, including the stain used for the leaves as well as the texture of the branches and the glaze. Years ago I developed a (almost literally) mind-bending matrix for my Hanging Bird Bowls, in which each piece (of over 100 pieces) was a unique combination of leaf stain and bowl glaze - but not only did it hurt my brain to figure the thing out, I often was unhappy with the results. So I have embraced my synchronistic associations of stain and glaze with given leaves and, coincidentally, vastly simplified my life. (I, of course, am more than happy to fulfill a client's differing requirements in the event of a commission.)
One of our favorite glazes is Vert Lustre, from the Amaco Potter's Choice series. This glaze is a rich, lustrous green that breaks a medium reddish brown - a perfect contrast and complement to the rust on the disks. I use this glaze, along with Sea Green Mason Stain, for all of my Eastern Cottonwood (Populus deltoides) pieces, from Hanging Bird Bowls and Leaf Pockets to Pillow Vases and Large Basins. Plus I had a slew of Eastern Cottonwood leaves I had collected from a friend's shop up in Dewitt, Michigan.
All the stars seemed aligned.
Sunday, March 10, 2013
Brake Disk Charger Part I: Large Applied Cottonwood Leaf Bowl with....
 |
| Large Applied Cottonwood Leaf Bowl with Brake Disk Charger |
Much of my work revolves around found objects - usually organic found objects, but everything is of interest, if not for my own benefit, perhaps for that of someone I know. One of my artist friends uses repurposed metal in his creations and I wondered if perhaps he might be able to use them.
The brake disks were very heavy and I was only 1-1/2 blocks into my 40-block walk, so I decided I would pick them up, if they were still on the roadside, when I drove out of my neighborhood to run some errands. Which they were, so I loaded them into the car and took them home.
I was unable to connect with my friend, despite repeated attempts to contact him. The brake disks languished in my garage for two years, one of them briefly granted a reprieve when it was utilized as a soil compaction device when another friend installed an in-ground fountain he had made for me. Then it was back into the garage, to rust and languish in peace, surrounded by accumulating garden detritus.
The art center with which I am most active - the Grosse Pointe Art Center - has as one of its occasional themes a show entitled "Urban Edge". This topic had always eluded me, due to my work's heavily organic aesthetic. When this show was launched in 2012, I could come up with nothing to fit the description; conversely, when the "Green Show" occurred in both 2010 and 2011, I had a relatively easy time coming up with ideas.
It wasn't until August or September of 2012, while my massage therapist/fellow artist/designer was working me over during our standing bi-weekly appointment that it hit me: What if I somehow combined my organic pieces with those by-now very rusted brake disks? The holes in the center of the metal pieces could easily accommodate a pottery bowl and the tension between the organic pottery and the decaying machined metal.
Tuesday, February 26, 2013
New Glazes!

Amaco's Potter's Choice series of glazes has been a real friend to me - most of the glazes have been great to work with. (There are exceptions and, in at least one case as far as I'm concerned, a complete misfire.) But their development of new glazes has not kept up with my expanding inventory. You can imagine my delight when I heard that my materials supplier, Rovin Ceramics of Ann Arbor, had decided to start carrying selected glazes from Coyote Clay & Color.
Rovin did a great job of generating samples not only on the standard white stoneware or porcelain body (standard practice in the industry) but also on the Peach Stoneware (RO-23) I use for a lot of my work. After perusing the test tiles, I selected ten of their glazes, samples of five of which are shown here, on Mini Sunflowers.
I started out by doing test tiles but, since I planned to use these particular glazes on my sunflowers, thought it would be a good idea to try them out in that format as well. My choices included Goldenrod Shino (MBG088, upper left, which has already gone into production for my revised Spinning Deluxe Sunflower Design), Butterscotch Shino (MGB 086, upper right), Leopard Shino (MGB089, center), Light Shino (MGB045, lower left) and, finally, Cedar Shino (MGB087, lower right, which I have combined with red iron oxide for a Dwarf Chinkapin Oak [Quercus prinoides] Leaf Pocket for my friend Chad Hughson of Hidden Savannah Nursery in Kalamazoo, Michigan).
I'm still sorting through the results, as it's important that the glazes I purchase be sufficiently distinct from one another to be worth purchasing but I'm pleased with these samples and will definitely be investing in the Goldenrod Shino when finances permit.
Kimono Lace Tea Set
 Having figured out how to actually make cylindrical forms using slabs with my yarn bowls, I got, well, I got pretty excited! A whole new world had opened up for me, where I could make vessels using my slab roller rather than the wheel or extruder. (I love my high-capacity extruder but the dies generate pretty thick clay sections, thicker than I really wanted for the sorts of vessels I wanted to make.)
Another format that had been a big, as-yet-unmet, challenge was that of a tray - the trays I had made previously had all warped horribly. My friend Juliet Smith helped me out with this one, sharing some of her experiences on Facebook, forcing me to realize I had to develop some serious patience and let these pieces dry out really slowly. Armed with my new-found knowledge and experience, I set out to combine them into a Japanese-inspired tea set.
I liked the idea of using the lace texture for these pieces, as I had with the yarn bowls, as they really reminded me of the brocades used in the obis for Japanese kimono. I used exactly the same technique for the cups as I had for the yarn bowls. After rolling out the clay slab, I blocked out the size piece for the cups. I wanted them to be modestly-sized, so their eventual contents wouldn't cool off before their users were finished. (I felt slightly smaller cups requiring slightly more frequent refills would be more conducive to keeping tea hot.) I rolled the lace onto the clay slab and cut it to size, bevelled the bottom edge to make the bottom of a box, rolled the cylinder up and folded up the bevelled bottom and attached it to a small plain square slab, making sure the surfaces were well scored and slipped. I have found that an offset frosting or icing knife is perfect for smoothing the surface inside the bottom of the cup to make sure the join is secure; I also check and make sure the corners are well sealed (it wouldn't serve to have a leaky teacup!) I also use the frosting knife to smooth the inside of the seam, which is helped along by applying clay rosettes from the same lace pattern on the outside, not only sealing the seam but further enhancing the overall design.
 |
| Detail of cup |
For the tray, I rolled out a clay slab and rolled an oblong piece of lace into the surface. Cutting it to size - two inches longer and wider than the desired flat portion of the tray - I then marked off a one-inch square at each corner, cutting a section of clay from the inside point of the square to a point one-half-inch from the square's outside point. Removing the resulting small diamond-shaped piece of clay, I used a paint stirrer (any really flat "thing" will work), I turned up the tray's four resulting edges and scored and slipped then together, creating a bevelled lip making it easier to carry the tray and harder for things to slip off of it. I put the tray on a kiln shelf, covered lightly with plastic, and put it high up on my shelves where I wouldn't see it. Checking the tray the next day, it seemed to be drying fairly flat. Once it was more than leather hard, I removed the plastic, still allowing it to continue drying in the ambient studio conditions. Long story short, it dried perfectly flat!
Once all of the pieces were dry, I lightly sanded them with synthetic steel wool to make sure they would be pleasant to handle, then bisque fired to Cone 06. Before glazing, I lightly rinsed the pieces to make sure there was no remaining clay dust and then waxed the bottoms of the cups and tray. I dipped the cups about two thirds horizontally in Amaco's Potter's Choice Temmoku about two thirds; then I dipped each one two thirds from the other direction (so there was an overlap of glazes) using Indigo Float, Lustrous Jade, Vert Lustre or Textured Turquoise. (I dipped them all so the lace rosettes sealing the seam were at the center of the non-Temmoku side just for the sake of symmetry.)
 |
| Detail of tray |
This tea set actually sold recently on my Etsy site (www.etsy.com/shop/TheBlackCatPottery) but I plan to make another, this time with five cups, more in keeping with a traditional Japanese tea set.
Friday, February 8, 2013
Spring 2013 Workshops - Pottery and Garden
Finally - we have a schedule for our Spring 2013 Workshops - both our new pottery workshops, many of which were formerly offered by the now-defunct Firebrick Gallery and Pottery Studio, and our annual Clematis Pruning Workshop. If you are interested in registering for any of these events, please click on the links to the left, just above the calendar! All events are scheduled at Black Cat Pottery, 3903 Grayton St., Detroit, MI 48224.
Pottery Workshops
 Hanging Bird Bowl Workshop
Three sessions - Monday, March 11, 18 and 25, 6:30-8:30pm
$65.00 - covers all materials and firings.
Our ever-popular Hanging Bird Bowl Workshop returns for the third time. Use basic slab-building pottery techniques to create the perfect bird-friendly Spring-time gift for your favorite avid gardener or bird lover using real leaves from native Michigan plants. The first session will include step-by-step instructions to make your very own bird bath with Cheryl's expert instruction the second session sees us glazing our pieces in preparation for finishing. At the final session you will add the final touch - genuine leather lace to hang your bird bowl. No experience required!!
 Lace Bowls and Buttons Workshop
Two sessions - Monday, April 22 and 29, 6:30-8:30pm
$65.00 - covers all materials and firings.
Simple yet elegant - participants will learn how to make lace-embossed ceramic bowls that are both functional and beautiful serving- and centerpieces and unique lace-embossed buttons fit to embellish the most discriminating wardrobe, from hat to sweaters to your favorite jacket. Just in time for Mother's Day, too! The first session includes fabricating your bowls and buttons using both vintage and contemporary hand-made lace. In the second session, we will glaze our pieces using a selection of over 35 food-safe glazes! No experience required!
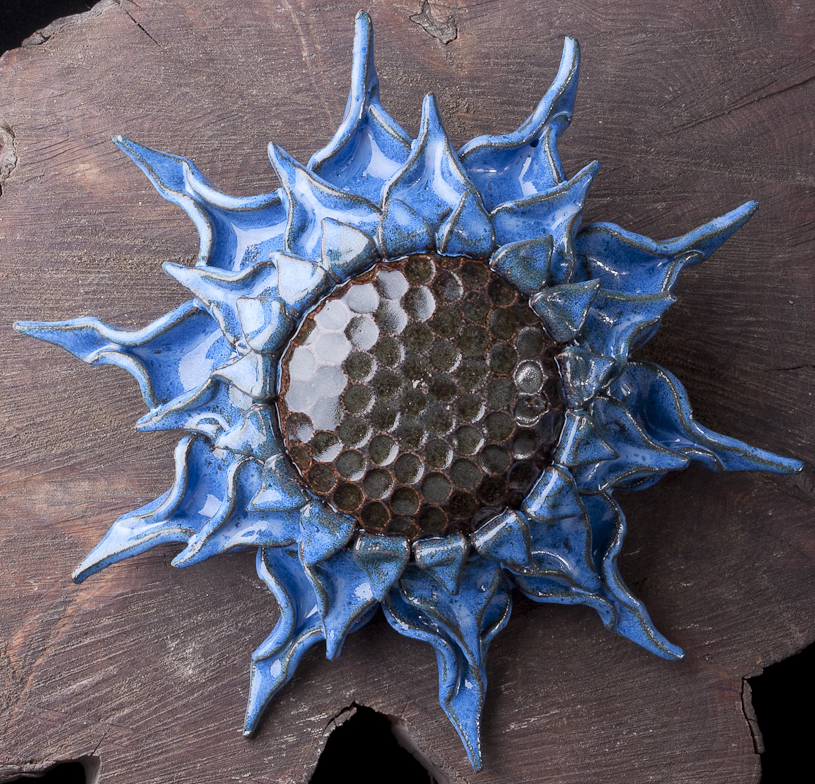
 Fancy Sunflower Workshop
Two sessions - Monday, 13 and 20, 6:30-8:30pm
$65.00 - covers all materials and firings.
Try yet another twist on the ever-popular sunflower theme - with cool new colors and textures. Novice and experienced potters will both enjoy this two-day workshop to create two sunflowers - just in time for the start of the gardening season! Our first session includes fabricating two sunflowers - both a mini and a tiny or small - so you have the opportunity to experiment with two textures (if you wish); in our second session you will glaze your sunflowers. Completed sunflowers are suitable for indoors or out. No experience required!
Gardening Workshop
 Clematis Pruning Workshop
Saturday, April 27, 10:00am-12:00n
$10 - covers all instruction, a comprehensive 10-page handout and refreshments
Long perceived as "difficult" or "temperamental", Clematis are actually proven performers that can give years of gardening delight. Join us for a hands-on workshop to learn about the care culture of these garden gems and specific pruning techniques and concerns for various species and hybrids. Bring your favorite (by-pass) pruners and a chair. Your $10.00 pre-paid/nonrefundable registration includes one hour of instruction and one hour of supervised hands-on experience. Pre-enrollment required, including your name and contact information in case of inclement weather. Limited enrollment. Two hours of education for Master Gardeners.
Pottery Workshops
 Hanging Bird Bowl Workshop
Three sessions - Monday, March 11, 18 and 25, 6:30-8:30pm
$65.00 - covers all materials and firings.
Our ever-popular Hanging Bird Bowl Workshop returns for the third time. Use basic slab-building pottery techniques to create the perfect bird-friendly Spring-time gift for your favorite avid gardener or bird lover using real leaves from native Michigan plants. The first session will include step-by-step instructions to make your very own bird bath with Cheryl's expert instruction the second session sees us glazing our pieces in preparation for finishing. At the final session you will add the final touch - genuine leather lace to hang your bird bowl. No experience required!!

Two sessions - Monday, April 22 and 29, 6:30-8:30pm
$65.00 - covers all materials and firings.
Simple yet elegant - participants will learn how to make lace-embossed ceramic bowls that are both functional and beautiful serving- and centerpieces and unique lace-embossed buttons fit to embellish the most discriminating wardrobe, from hat to sweaters to your favorite jacket. Just in time for Mother's Day, too! The first session includes fabricating your bowls and buttons using both vintage and contemporary hand-made lace. In the second session, we will glaze our pieces using a selection of over 35 food-safe glazes! No experience required!
 Fancy Sunflower Workshop
Two sessions - Monday, 13 and 20, 6:30-8:30pm
$65.00 - covers all materials and firings.
Try yet another twist on the ever-popular sunflower theme - with cool new colors and textures. Novice and experienced potters will both enjoy this two-day workshop to create two sunflowers - just in time for the start of the gardening season! Our first session includes fabricating two sunflowers - both a mini and a tiny or small - so you have the opportunity to experiment with two textures (if you wish); in our second session you will glaze your sunflowers. Completed sunflowers are suitable for indoors or out. No experience required!
Gardening Workshop
 Clematis Pruning Workshop
Saturday, April 27, 10:00am-12:00n
$10 - covers all instruction, a comprehensive 10-page handout and refreshments
Long perceived as "difficult" or "temperamental", Clematis are actually proven performers that can give years of gardening delight. Join us for a hands-on workshop to learn about the care culture of these garden gems and specific pruning techniques and concerns for various species and hybrids. Bring your favorite (by-pass) pruners and a chair. Your $10.00 pre-paid/nonrefundable registration includes one hour of instruction and one hour of supervised hands-on experience. Pre-enrollment required, including your name and contact information in case of inclement weather. Limited enrollment. Two hours of education for Master Gardeners.
Saturday, January 26, 2013
Gerbera Daisies
 After I "mastered" my Original Sunflowers and long before I even thought of making Fancy or Deluxe Sunflowers, I wanted to try my hand at making other types of flowers that could go on stakes. Daisies and daisy-like flowers immediately came to mind. Following the same routine I had developed with the sunflowers, I created templates for three sizes of daisy petals.
I had an interesting Shasta Daisy cultivar that seemed to be somewhat doubled, with two rows of petals. One of the challenges with all of these types of pieces is having it all hold together through the fabrication, drying and bisque-firing steps of the process. The pieces of clay used to make the petals are so small that they need all the help they can get to "hold it together." The most difficult step was transferring the bone dry pieces to the kiln shelf for bisque firing.
I started out by making the flange - the portion of the clay used to make the center of the flower that extends beyond the edge of the underlying mold - very wide to support the petals applied on top of it. I also used at least two rows of graduated petals to provide additional bracing. These two steps helped but I still experienced a lot of product loss attributable to the greenware loading phase.
Eventually, I figured out that, if I loaded the pieces onto the shelves right after I have finished fabricating them - pulled them off the molds when still only leather hard (or even sooner), put in the holes for a quarter-inch post and for a wire for hanging, made other final touches and signed the pieces, I load them directly onto the shelves right there an then. I have learned that I can actually load right side up and upside down, as long as I'm very careful. Because the pieces are not yet dry, they are less brittle and more able to accommodate. The only trick is to not try to load the full shelves right down to the bottom of the kiln: they are very heavy and the petals usually extend slightly beyond the edge of the shelf, so it's better to have loaded other work for the first two to three levels in the kiln. Through this technique, I have been able to reduce my loss in this phase of the process to less than five percent. (Losses later in the process have always been negligible.)
 |
| Baby Daisy |
The pieces are very similar to the sunflowers in construction. Using White Stoneware for Daisies and Gerbera Daisies and Peach Stoneware for Black-eyed Susans, a textured slab of clay (I initially used the waffle-textured foil lid found on cans of peanuts and mixed nuts, but those didn't hold up very well over time and so switched to burlap to give the sense of the disk flowers in the center of each blossom) is slumped over a mold made from a small bowl. The slab is cut so a quarter- to a half-inch clay flange extends beyond the edge of the mold, which is scored and slipped. Petals are applied (the bases of the petals are actually folded over to provide more support and adhering surface area) around the flower's center.
What is different about the these pieces is that, once I've applied each row of petals and patted each into place securely, using my nitrile-gloved thumb or a soft wooden tool, I score a mid-rib on each petal, a small detail that really adds some sorely-needed dimension to the pieces after they are stained or glazed. I the apply the additional row(s) of petals (there are a total of two rows for Baby Daisies and Regular Daisies; Deluxe Daisies have three rows of graduated petals), scoring each row of petals as I did the first. Then, I "roll" the tips of pairs of petals toward one another to create an undulating sense of movement for the entire piece.
 |
| Regular Gerbera Daisy |
Glazing for the Gerbera Daisies consists of brushing Titanium Mason Stain solution on the center and pulling off the excess, once dry with a damp sponge to bring up the texture. Sometimes I wax the center but not always - if you have a steady hand, you won't need to do so. I apply two coats of Amaco's Celebration Series glazes to the top side of the petals, being careful to work it into the areas between petals and around petals that have been twisted or rolled. One coat is applied to the underside. (I usually alternate, applying the first coat to the top, then flipping the piece over and glazing the bottom; by the time I'm done what that, the top is usually dry enough to reglaze). I pop the piece on a three-inch kiln post to dry completely before taking them out to the kiln to load. (Note: The Lilac and Burgundy in this glaze series seem to need three coats to get adequate coverage.) I load the pieces on stilts and fire to Cone 6.
 |
| Deluxe Gerbera Daisy |
Once cooled, I make sure the holes for the quarter-inch post are the right size; if not, they are easily corrected with a Dremel and diamone bit. I add a piece of plastic-coated picture wire and they're ready for use, indoor or out, on a post or just to hang.
The Gerbera Daisies come in three sizes (Baby, Regular and Deluxe) and 21 colors - all 20 colors from the Amaco Celebration Series plus my own proprietary "Gerbera Daisy Pink" I developed some years ago using a mixture of two glazes from that series plus one from their Sahara High Fire Series. The pieces are weather proof and can stay outside here in Michigan all year long.
Subscribe to:
Comments (Atom)

