Sunday, March 16, 2014

Pillow Vases IV: Frosted

One of my favorite decorating tools in the studio is a pastry bag filled with slip with any one of the various decorating tips I've purchased over the years. I found my first "set" of decorating tools at K-Mart, when Martha Stewart still had a relationship with them - the kit I purchased (in a very nice lidded metal box) had her name on it. Since then, I've scoured cake decorating aisles at Michaels and JoAnne's for new and exciting effects. I find myself most often using star, round (of various sizes) and ribbon tips for my projects. The "Frosted" Pillow Vase designs are made using a "star" tip.

After assembling the Pillow Vase vessel form, it's often too dry to decorate right away. If that's the case, I can either re-hydrate it by draping with a damp rag and placing in a plastic bag or brush the surface with slip intermittently before adding the decoration. Once the piece is moist enough to successfully accept the decoration - moist but not so plastic that the clay will buckle at all with any pressure), I can apply whatever decoration I choose - spirals made from extruded clay, rosettes cut out from a thin slab of clay or slip decoration using a pastry bag and various tips.

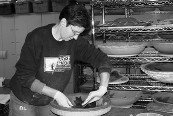
For this "frosted" decoration, I use a pastry bag with a star tip. I score and then slip around the vase's opening and along its waist - the location of the join between the two parts of the vase. In the case of those tiny vases with a "pansy frog" (see two vases to the right side of the picture to the right), I mark a circle that encompasses all the openings and score and slip around it. (By slipping the scored area, the applied decoration does tend to conform to the piece more successfully.) I apply a circle of rosettes around the opening first, then around the waist, thus minimizing the risk of "messing up" the work I've already done. I'll either use my finger or a tool of some kind (doesn't really matter which), I clean the opening of any encroaching clay before setting it to dry. It's important with these pieces to make sure to sand the decorated area before bisque firing as the slip can dry into very sharp edges.


Black Cat Pottery 2014 Calendar of Events

Saturday, April 26, 2014, 10:00am-12:00n:  Clematis Pruning Workshop Long perceived as “difficult” or “temperamental”, Clematis are actually proven performers that can give years of gardening delight. Join us for a hands-on workshop to learn about the care and culture of these garden gems and specific pruning techniques and concerns for various species and hybrids. Bring your favorite (by-pass) pruners and a chair. $10 pre-paid/nonrefundable registration includes one hour of instruction, an hour of supervised hands-on experience, refreshments and a comprehensive hand-out. Pre-enrollment required, including your name and contact information in case of inclement weather. Limited enrollment. Two hours of education for Master Gardeners. Register at www.blackcatpottery.com.

May 31 and August 16, 2014 (Saturday), 10:00am-2:00pm: Annual Spring/Summer Garden Tours. Cheryl's life-long love of Clematis and her more recent obsession with native plants are both immediately apparent as you arrive at her garden. Designed as a teaching and learning space, her garden includes numerous Clematis, representing over 10 species as well as large-flowering hybrids, and over 200 species of native plants, ranging from Spring ephemerals to trees, shrubs and vines. Take advantage of this opportunity to become acquainted with some of the lesser-known small-flowering species Clematis varieties and the beauties of our native flora. Cheryl's garden was featured in the July 2009 issue of Michigan Gardener, a publication for which she also writes about Clematis and native plant topics. We will feature at least one hands-on workshop (pre-paid registration required), prints and notecards by Notable Greetings, hypertufa garden furnishings by Farmbrook Designs, Black Cat Pottery’s garden-inspired pottery and other locally-sourced creative products. We also feature a limited selection of seasonally-appropriate native plants and a butterfly release at the Summer Tour. Qualifies for Master Gardener Educational Hours. No fee or pre-registration required for the tour.

December 13, 2014 (Saturday), 10:00am-4:00pm. Join Cheryl English’s Black Cat Pottery and other Michigan artists for a day of holiday cheer. Meet the artists, enjoy holiday goodies and take care of your last-minute gift needs with handmade art for the home and garden! In addition to our garden-inspired pottery creations, we’ll be sharing our studio space with Don Schulte of Notable Greetings with his line of exquisite note cards and prints; Chris Hopp of Farmbrook Designs with his beautiful hypertufa lanterns, fountains, planters and other garden accoutrements; Glenda Hopp of So Many Colors with her one-of-a-kind hand-dyed cotton wearables; and Shelley Rothenbuhler, all made right here in Michigan! Locally made refreshments and musical accompaniment, as well as a book signing by a local author, round out the day.  Join us for some holiday cheer, get to know the artists and take care of your last minute gift-giving needs!  Bring a friend and spread the word!

Other Activities  Schedule an activity for your group or organization!

Pottery Workshops. Choose from a variety of projects for two (Original, Fancy or Deluxe Sunflower; Wall Pocket; Leaf Pocket; Applied Leaf Bowl; Leaves; Lace Bowls) or three (Hanging Bird Bowl) sessions. (Other workshop projects are available upon request.) 

Hypertufa Planter Workshop. Under the guidance of artist Chris Hopp, owner of Farmbrook Designs, make your very own unique hypertufa planter. (Advanced classes are available upon request.)

Botanical Monoprint Workshop. With the help of artist/educator Christine Laikind, make your very own unique botanical monoprint using material from the garden.

Botanical Cyanoprint Scarf or Notecards Workshop. Make your very own unique printed notecards or scarf with the assistance of artist/educator Christine Laikind, using special materials and the sun’s light.

Call or e-mail Cheryl English for additional information
or to book a private garden tour and presentation
or other activity for your group!


All events at 3903 Grayton St., Detroit, MI 48224-4003
Contact:  (o) (313) 885-3385/(m) (313) 690-3385
Check our website at www.blackcatpottery.com
Find us on Facebook at www.facebook.com/BlackCatPottery
Visit our Etsy Shop at www.etsy.com/shop/TheBlackCatPottery

Sunday, February 23, 2014

Pillow Vases III: Lace

My Lace Bowls are some of the most popular pieces in my oeuvre. Their evolution started with a piece of lace I picked up at Michael's and used as one of the textures in my Original Sunflower series. The texture was fairly highly relieved and had a rich, tapestried quality.

I liked the results so much, it became one of the textures I selected for my Fancy Sunflower series, for which I employed some of the more highly-relieved surfaces I had used for my Original Sunflowers - important because I was going to glaze the centers and the designs needed to handle two to three glaze coats.

At about the same time, I was exploring textures with some bowl forms; many of the glazes in my palette are reactive glazes that break to different colors over deeply-relieved textures - I had noticed this characteristic on the test tiles I had made and on the glazed sunflowers I was producing. I started playing around with the idea of lace-textured bowls, buttons and wall art - a product line that has become quite successful and continues to evolve; I'm now experimenting with larger platter-type centerpieces using vintage and contemporary lace.

Once I started working on the Pillow Vase concept, it seemed obvious to use the lace texture again, as it had been so successful in other genres. The challenge here was that, rather than using the lace for the inside of the bowls, I was using it for the outside. Whereas I had easily turned out bowl after bowl using the same piece of lace - rolling out the slab, rolling in the lace, forming the lace slab into the bowl and peeling the lace away, then starting on another piece, I had to invert the process so the lace side of the slab went into the bowl first.

After much trial and error, I've developed a reliable process for these pieces, forming the slab bowl into the mold and roughly trimming, then setting to dry until the lace-covered clay releases. I peel the lace away, place the (still-plastic) clay back in the mold and, gently yet firmly, form it into the mold, especially at the lip, trim and score. I don't cut any holes until after I've removed the pieces from the mold. I select the half for which the lace design's center most closely conforms to the center of the bowl form and use that as the orientation for the finished vase's opening.

The pieces are slipped and joined; the join looks like a natural part of the design, forming a resolved part of the lace motif.

Sunday, February 16, 2014

Pillow Vases II: Rosette

One of the reasons I wanted to investigate the "Pillow Vase" concept was because I was interested in a mostly-closed form that could be very stable and hold a fair amount of water, minimizing the necessity for refilling the reservoir. I also thought it might be worthwhile to develop a form having a low profile, making it more functional as a dinner table centerpiece - something that wouldn't necessarily interfere with guests' eye contact with one another. I also liked the idea that, in the case of the vases with a single large opening, a pin frog could be used as desired but wouldn't be necessary; once could cut the stems short and fit them tightly into the opening. I also felt that the pieces should be able to stand alone - without flowers - as objects of beauty in and of themselves.

Once the vase sections have dried enough to release from the molds, they're ready for assembly. In the case of the Tiny vases with the multiple openings (much like an old-fashioned pansy vase), I use a Kemper 1/4" Hole Cutter to create an array of 17 holes in the top of the vase, as seen in the piece at the far left of the photo to the left, before assembly. The array is cut entirely freehand but I'm usually able to eyeball it fairly well. I often use a large loop tool to clean up the inside of the top after cutting the openings.

I slip all the pre-scored cut edges of the sections and join tops to bottoms, sandwiching them together. I use a combination of a fairly soft rubber kidney and a metal kidney to marry the pieces to one another. I use an elephant ear sponge to clean the join and work out any inconsistencies.

When I made my Lace, Embossed Leaf or Striped Bowls, I noticed that they would often warp. This is not a problem with these pieces as the two sections hold one another in tension - I have never had one warp (yet!) By using fairly consistent slab thicknesses and joining them firmly together, they seem to stay true to form.

If the pieces are going to be plain, I set them to dry. If I'll be decorating them, I may set them aside to dry some more if they're too plastic such that they may deform in the application process. It's a fine line between being firm enough to not distort and being too dry to take the decoration successfully.

The Rosette pieces are decorated with rosettes cut using Kemper Klay Kutters 5/8 inch "Basic Shapes" set. I either slip the vase's entire top surface or score and slip each individual rosette as I apply it. I apply two to three graduated circles around the center opening (three on all but the Tiny vase with the pansy vase opening). I then set the pieces to dry.


Monday, February 10, 2014

Pillow Vases I: Scrolls

One of the first things I did after my divorce was to go and purchase the tableware I had been looking at for years - a set of Colorstone stoneware dishes from Sasaki in a matte black finish. All of the pieces in this range are based on sections of variously-sized spheres - smaller spheres for the bowls, larger ones for the plates and platters. My idea was to have these very simple, elegant dishes for place settings and collect, over time, hand-made serving pieces; I thought the sophisticated spareness of the place settings would be a complement to a varied selection of handmade serving pieces, making for an interesting table for any occasion.

After I purchased the pieces, I started using them - directly and indirectly - in my pottery as molds. I used the salad plate to create my sushi plates and created molds from the coupe soup bowl to form my poppies and other pieces. I eventually invested in additional pieces (not always in the black) simply to use as molds in the studio, rather than constantly raiding my kitchen cupboards. I started using them to make Lace Bowls, then Embossed Leaf Bowls; I used molds I made from them for my Applied Leaf Bowls.

It was when I was making some Embossed Leaf Bowls that I started thinking about using these same forms for making Pillow Vases - mostly closed, pillow-like forms for flower arranging. I thought I could take two molded sections and marry them.

The great thing about this approach is that, while slab bowls can sometimes warp - the technique is generally less consistent than wheel-throwing, by putting two of them together, they hold one another in stasis, making for a piece that maintains a uniform shape.

To start the process, I roll out a slab of clay about 1/4" thick. I cut a circle appropriate to the size of the piece I'm doing and slump it into the mold. Using a damp sponge, I force the clay into the mold as consistently as possible. I also use a very smooth river stone for this step. Once the piece is consistently molded, I use sharp cutting tool to trim it down to the edge of the mold. (The Colorstone as a flat lip which makes this step really easy.) If I'm making a single large opening (which would allow the vase to take a pin frog) or a single small opening (suitable for an ikebana-type arrangement), I'll cut that out using either a cookie cutter or a 1/2" round Kemper Klay Kutter (only for one of the two sections, for the top). I also score the cut edge in anticipation of assembly. I set the pieces to dry - out in the sun in the summer; under the heat vent during winter - until they will release from the molds (which are not porous). In my next post, I'll describe assembling the basic vase.

For the Scrolled decoration, I use a Kemper Klay Gun with one of the round dies. I extrude a length of clay and fabricate three loose arabesques (the clay scrolled at either end with a straight section in the center - the length of these determined by the size of the vase I'm making - Large, Medium, Small or Tiny) and - using shorter lengths of clay - six tight arabesques. (When I first started working with these design elements, my application was much more varied, both in number of elements and relative placement; I found, in doing production, coming up with a consistently satisfying arrangement I can repeat with minimal variation was essential to my sanity.) I flip these over, score and slip them and then apply them to the vase so the three longer pieces almost meet one another over the vases surface and pairs of the smaller ones "bracket" each resulting intersection. I gently firm the to the vase's surface and allow then to dry.

Saturday, February 1, 2014

Goth/Steampunk Pillow Vases

In developing a possible product line for the upcoming DetCon1, I thought it might be worthwhile to take some of my existing designs and revisit them with more of a Goth/Steampunk sensibility. For those of you who are unfamiliar with either of these aesthetics, "Goth" relates to a post-punk era subculture which draws upon influences from 19th-century Gothic literature (think Mary Shelley's Frankenstein, for example) and horror films, often characterized in popular culture through fashions reflecting Victorian styles, most often with dark clothing, make-up and hair styles. "Steampunk" is a sub-genre of science fiction typified by steam-powered machinery, particularly in a context inspired by early industrialized Western culture - especially the 19th century. Like the Goth aesthetic, Steampunk is inspired by the works of Mary Shelley, as well as those of Jules Vern and H.G. Wells.
Back in September, when my friend Sharon (who frequents these events and puts a great deal of effort into creating unique costumes for them) first suggested that this might be a new market for my work, I took some of the Pillow Vases I had already bisque-fired and tried the four metallic glazes in my repertoire. Metallic Black is a glaze recipe I was given by my first pottery teacher, Gene Pluhar. The other three glazes - Saturation Metallic, Saturation Gold and Palladium - are all from Amaco's Potter's Choice Series. With the exception of the Palladium glaze, all are food safe. For this reason, I never use the Palladium on any piece that might conceivably be used for food or beverage for any species - not just humans. I felt the Pillow Vases were a safe bet, though; I can't imagine someone deciding to use them for food service - in fact, I'm not sure they could!

I glazed up at least one of each style - Rosette, Lace, Frosted, Scrolls and Sea Urchin - in sizes ranging from Tiny to Medium. (I wasn't willing to take a risk with a Large Pillow Vase, as those are sufficiently demanding of materials and my effort that I didn't feel it necessary.) I got together with my best friend, Catherine, to celebrate her birthday with a nice meal out and brought the pieces with me for Show & Tell afterwards; I needed some feedback and Catherine has always been willing and able to provide me with useful insights regarding my work. Generally, she was favorable in her critique; she really liked how the Saturation Metallic and Saturation Gold glazes looked on the pieces, especially the Saturation Gold on the Sea Urchin Pillow Vase.

(The example I had for that was a Small Vase. She liked it so much, she showed me how she would display such a piece in her living room, making the observation that it would have to be much larger to work in that space; I later made her, especially, a Large Sea Urchin Pillow Vase in Saturation Gold and left it for her one time when I stopped by to surprise her.)

Catherine was less taken with the Metallic Black and Palladium glazes, although she did not reject them entirely, merely observing that they did not seem to work as well for the particular designs I was showing her as the Saturation Metallic and Saturation Gold examples. She also suggested that I might investigate doing some plain Pillow Vases - with no decoration at all; she felt those might show of the glazes to best advantage.

I decided to do a series of 24 Tiny Pillow Vases: four of each of the five existing designs plus four plain ones; I also varied the openings - the single small opening, or Ikebana vase; the larger single opening that could take a small pin frog; and the "built in" frog with an array of 17 openings for flower-arranging novices. (Being the obsessive-compulsive person that I am, I made sure that there would be an equal distribution of the three openings across the 24 vases and amongst the 6 designs and four glazes.)

I was very happy with the results, especially with the Saturation Metallic and Saturation Gold glazes. The pieces
glazed with Saturation Metallic looked particularly metallic, especially the plain Pillow Vase (see below, the vase farthest left). The experiment seems to confirm our initial determinations, that the Saturation Metallic and Saturation Gold glazes are both safe bets, with the other two glazes less successful but still acceptable. I'm looking for some additional glazes to try - I've been working with Coyote's Gun Metal Green and have some of their Bronze Temmoku to try. So, it will soon be time to glaze up some more pieces and see how they turn out.

As for the photo shoot, Don and I felt that we needed a different background for these pieces, rather than the wood slice we've used so successfully in the past. We concurred that something more "industrial" would be more appropriate. I found a piece of expanded metal in my store room, one side of which still had some black paint from a previous use. It turned out to be the perfect background for the Goth/Steampunk Pillow Vases and Lace Bowls, as well as for the masks I had done almost 20 years ago.

Tuesday, January 28, 2014

Masks: The Great Gorgon

I started taking pottery classes in January 1993, a few months after moving back to the Detroit area from a two-year sojourn in Northern California. I had always wanted to do pottery and finally found my opportunity through adult education classes offered through the local school system. The classes were taught in the instructor's classroom - he taught high school studio art, including sculpture and jewelry making; the facility was a veritable treasure trove of tools, from typical pottery equipment to drill presses, propane torches and sandblasters, most of which I eventually used.

Medusa Rondanini
I tried everything - the wheel, the extruder, the slab roller, the spray booth. I learned about making molds and glazes. I eventually made a cast of my face (with the assistance of another student) and started exploring its potential to express some of my feelings about the experiences I had had in the past few years with my family and during my marriage. Early on, I started a series of dozens of masks, the first of which was an image of Medusa inspired by the Medusa Rondanini, a piece I had studied in college and graduate school. Like a portrait of Julius Caesar I had studied during the same period, I was utterly flabbergasted at the beauty of the piece and it haunted me for years.

Medusa I
Although first mask I made was, not surprisingly, a Medusa, I didn't realize that would be the outcome when started. Utterly ignorant of the best way to pursue this particular process (I would later learn that a relatively thin - 1/4" - slab will do the trick, with some work), I shoved wads of clay into the mold, squishing them together. When the clay had shrunk somewhat, I pulled it out but twisted it a bit, which caused the wad that was the tip of the nose to become skewed. The piece wasn't what I wanted - event though I could "fix" the nose, there were significant fissures between the wads which made the face look coarse and unfinished to my eye (even at that stage) - but I realized it might make an interesting piece nevertheless - remembering the Late Hellenistic or Early Augustan sculpture. I fabricated three snakes and attached them to sinuously embrace the entire face. I finished the piece with a raku firing, using Crackle White glaze for the face and Copper Sand for the snakes.

I pursued the idea further, making three more masks, one very similar to the first, two others with the snakes more complex and inter woven (Medusas II, III and IV, left to right, above), while I was pursuing other mask concepts. I decided to try a really ambitious piece based on Athena's aegis. the goatskin that the Greek goddess of war, weaving and wisdom wore over her breastplate, on which the head of Medusa was placed when Perseus gifted her with it.

I rolled out a thick slab of clay and cut away the center to insert a mask. I added over two dozen snakes, arranged around the face but also extending out onto the slab; I hoped, by anchoring the snakes in a complex network around the face and onto the slab, it would help "knit" the piece together structurally. I also punched three holes in the slab so it could be bolted to a slab of wood for display. The piece - rather miraculously, considering the stresses inherent in its construction and its size and weight, survived the bisque firing. I glazed it as I had most of the others - Crackle White for the face, Copper Sand for the snakes. Additionally, I applied, using the Copper Sand, stars and phases of the moon across the slab.

Firing the piece was a bit of a challenge - due to its weight (very heavy), overall dimensions (a large flat slab) and construction (the mask inserted into the slab and the applied snakes). Amazingly (and this is no exaggeration), the piece survived the raku firing and subsequent smothering in combustibles, only cracking when it was laid to rest on a work table in the studio. (It would be expected that, considering the thermal stresses inherent in a raku firing - in which the bisque-fired clay is  rapidly heated to over 1900 degrees F and, even more quickly, cooled to the ambient temperature, that complex pieces would crack.)

To finish the piece, I collected the sections of the piece and glued the reassembled work to a piece of heavy canvas. Using a propane torch, I scorched a piece of scrap plywood I had cut to size with a table saw. I drilled holes into the wood to correspond to the holes I had made in the slab, as well as four additional holes to take bolts for hanging wire. I took a large piece of black window screening and scunched it up, painting areas of it with copper spray paint, and bolted that between the wood and pottery slabs. I added heavy-duty hanging wire to the back.

This piece was featured in my first solo show, at Planet Ant Coffee House (now Planet Ant Theater) in 1995, as the centerpiece of the "Girls Gone Wrong" wall.