 One of the first things I did after my divorce was to go and purchase the tableware I had been looking at for years - a set of Colorstone stoneware dishes from Sasaki in a matte black finish. All of the pieces in this range are based on sections of variously-sized spheres - smaller spheres for the bowls, larger ones for the plates and platters. My idea was to have these very simple, elegant dishes for place settings and collect, over time, hand-made serving pieces; I thought the sophisticated spareness of the place settings would be a complement to a varied selection of handmade serving pieces, making for an interesting table for any occasion.
After I purchased the pieces, I started using them - directly and indirectly - in my pottery as molds. I used the salad plate to create my sushi plates and created molds from the coupe soup bowl to form my poppies and other pieces. I eventually invested in additional pieces (not always in the black) simply to use as molds in the studio, rather than constantly raiding my kitchen cupboards. I started using them to make Lace Bowls, then Embossed Leaf Bowls; I used molds I made from them for my Applied Leaf Bowls.
 It was when I was making some Embossed Leaf Bowls that I started thinking about using these same forms for making Pillow Vases - mostly closed, pillow-like forms for flower arranging. I thought I could take two molded sections and marry them.
The great thing about this approach is that, while slab bowls can sometimes warp - the technique is generally less consistent than wheel-throwing, by putting two of them together, they hold one another in stasis, making for a piece that maintains a uniform shape.
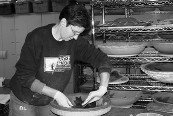
To start the process, I roll out a slab of clay about 1/4" thick. I cut a circle appropriate to the size of the piece I'm doing and slump it into the mold. Using a damp sponge, I force the clay into the mold as consistently as possible. I also use a very smooth river stone for this step. Once the piece is consistently molded, I use sharp cutting tool to trim it down to the edge of the mold. (The Colorstone as a flat lip which makes this step really easy.) If I'm making a single large opening (which would allow the vase to take a pin frog) or a single small opening (suitable for an ikebana-type arrangement), I'll cut that out using either a cookie cutter or a 1/2" round Kemper Klay Kutter (only for one of the two sections, for the top). I also score the cut edge in anticipation of assembly. I set the pieces to dry - out in the sun in the summer; under the heat vent during winter - until they will release from the molds (which are not porous). In my next post, I'll describe assembling the basic vase.
 For the Scrolled decoration, I use a Kemper Klay Gun with one of the round dies. I extrude a length of clay and fabricate three loose arabesques (the clay scrolled at either end with a straight section in the center - the length of these determined by the size of the vase I'm making - Large, Medium, Small or Tiny) and - using shorter lengths of clay - six tight arabesques. (When I first started working with these design elements, my application was much more varied, both in number of elements and relative placement; I found, in doing production, coming up with a consistently satisfying arrangement I can repeat with minimal variation was essential to my sanity.) I flip these over, score and slip them and then apply them to the vase so the three longer pieces almost meet one another over the vases surface and pairs of the smaller ones "bracket" each resulting intersection. I gently firm the to the vase's surface and allow then to dry.


No comments:
Post a Comment