Just as I had had a table made by a welder I used to know, he had also made a Large Bird Bowl stand. The initial design he came up with consisted of a tripod formed from slightly bent stock (so it would look more organic) with curled feet. (The curled feet minimize the risk of damage to the surface on which the piece rests.) Subsequent designs were altered to more completely complement my Large Bird Bowl designs, leaving this stand to languish.
I decided this year to design a bowl specifically for this stand, incorporating spiral elements to complement the curved feet. This was an offshoot of my "Starry Night" Deluxe Sunflower design, translated and adapted to a new format.
Making these large bowls can be challenging. One key is to make sure it is consistently thick enough to minimize risk of warping through the drying and firing processes. It is also helpful to allow it to dry as slowly as possible to reduce the chances of cracking - I sometimes cover these pieces or was them, as appropriate, to make sure the clay has the opportunity to shrink consistently.
 |
| Detail of Spirals and Circle Cut-outs |
Once I had fabricated the main bowl in the mold, I used my Kemper Klay Gun with the half-round die to make the "spirals" to decorate the inside of the bowl. (I use the triangular die to make the spirals on the "Starry Night" sunflowers.) I have discovered the best way to obtain long, continuous sections of extruded clay is to point the Klay Gun downwards; this way, there is less stress on the clay so it is less likely to break off and will be less inclined to spiral on its own, making it easier to manipulate.
 |
| Spiral Libation Bowl with Stand |
I do not score the inside of the bowl because I don't really know how the spirals will be arranged in advance but I do slip it thoroughly - this way, I can nudge the pieces of clay making up the spirals around to adjust the curves to my satisfaction. I attach the wider base of the half-circle section to the bowl and gently curve them around, making large and small loops while retaining an undecorated area of consistent width around the rim of the basin.
Once all of the spirals are finished, I roll out a thin slab of clay and, using a half-inch round Kemper Klay Kutter, I cut out a number of circles, which I then score, slip and attach in the centers of the spirals and other interstices in the design, as with the "Starry Night" sunflowers, to add the final touch to the composition. The piece is allowed to dry slowly until leather hard, then removed from the mold and allowed to slowly dry until bone dry. I sand the form with synthetic steel wool, then fire slowly to Cone 06.
I wanted to combine a metallic finish with a more conventional glaze selection so, after thoroughly rinsing the piece to remove any dust, I first brushed on three coats of Amaco Potter's Choice Saturation Metallic on all of the spirals and flat circles making up the design in the basin. After these were completely dry, I brushed on a coat of wax resist. Once this had thoroughly dried - I find it best to wait six hours after application for optimal results, I poured Amaco's Potter's Choice Indigo Float over the entire piece, dabbing off the beaded-up glaze from the spirals and flat circles. I then fired it slowly to Cone 6 on three large stilts spaced around the center to minimize warping. (Placing one large stilt at the center doesn't seem to work very well on these large pieces, resulting in unfortunate and inconsistent warping of the pieces.) I could have avoided using stilts if I had waxed the bottom of the piece but, as I intended it to go into a stand such that the bottom would be visible, I opted to glaze the entire basin.
 |
| Dora assists |
Once fired, I always allow kilns holding large pieces of this type to cool down below 200 degrees before even popping them open, thereby (theoretically) reducing the risk of fracturing as a result of thermal shock. (The kiln can be vented immediately after the firing is completed.) Once completely cooled, I use a Dremel to grind down the stilt marks.
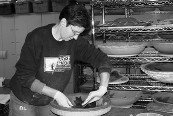
Dora generously assisted us in shooting the Spiral Libation Bowl when we finally got around to photographing it. The piece actually sold shortly thereafter at my 2012 Holiday Open House, albeit with a different stand - so I guess I'll be making another one soon!


No comments:
Post a Comment