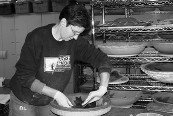
 As a potter, certainly one of the driving forces of my creative process is my interest in texture. If you work with clay, you know that, unlike painting, for example, there's often nothing between your hand and the material; the tactile is key. When I was first developing the designs for what are now my Deluxe Sunflowers several years ago, I came up with three applied textures; two of which, not surprisingly, were (and still) are extremely labor intensive.
Probably the most challenging design technically is what I call my "Pasta" texture, as it reminds me of really fine spaghetti, cut short and applied on end to the center of the sunflower. My usual process with these pieces is to drape a slab over the mold to create the raised center for the flower and either apply the petals and then the texture (as with my Bubbles design) or apply the texture and then the petals (as with "String Theory); in either case, the goal is to make sure there is no "gap" between the petals and where the center starts. The decision as to the order of work has to do with the manner in which the texture is applied. As with all the sunflowers, they are taken off the mold when sufficiently dried to remain rigid but permit final steps to allow hanging (holes made to allow wire) and/or staking (in the case of the larger pieces, a clay socket to take a copper plumber's fitting; for the smaller pieces, a hole and a socket to take a 1/4" steel stake).
With the "Pasta" design, it didn't work to apply the texture before it came off the mold. (Believe me - I tried it that way; good thing greenware is recyclable!) The surface is simply too delicate - made up of thousands of tiny tubes of clay - to take the weight of supporting the piece as it's flipped over and holes made and the clay socket applied. The solution with this piece (I can get away with the usual order of work in the smaller pieces, as my large hands can span the sunflower's center and support it with the petals resting on my) was to lay the slab center and add the petals, then let it dry as usual. When it was sufficiently dried to retain its shape (with some pressure), I remove it from the mold, add the holes and clay socket, flip it back over onto a large kiln shelf, then apply the center. Which consists of loading my Klay Gun (which has a fine screen as the die) with numerous large coils of clay and extruding 1/2-3/4" bundles of clay and applying each bundle to the center, over and over and over again, until it is filled in. The piece is then let dry and fired as usual.
Glazing is also a bit different with this design. First, to make sure the extrusions are about the same height to make for a more consistent surface (and one less prone to damage later in life), I take a3" kiln post and rake it side-on across the center surface to break off any excessively tall pieces of clay. Because of the high level of surface area of the extruded texture, the center is capable of absorbing a significant amount of water but takes forever to dry. I'll rinse the piece off to remove and dust and minimize glaze absorption but I have to let it dry out quite a lot. then I apply the glaze for the center, Amaco Potter's Choice Temmoku, blotting it in to get the glaze between and in all around the texture. The glaze can run as the clay becomes saturated, so I take a long break between the first and second coats. Once the center is completely dry after the second coat of glaze, I apply wax resist. Then I glaze the petals.
I chose Amaco Potter's Choice Shino for this piece. I have had a hard time getting this glaze to mix up in the bucket for me; it settles out into this immovable viscous mass in the bottom of the bucket. What I've started to do is pull up some of that material out of the bucket, put it into a recycled yoghurt container and add some of the more fluid material. I can more easily mix small quantities of the glaze. I then apply by brush, dabbing rather than brushing. The glaze gets an interesting cratered appearance with this technique, which really sets this design apart from the other pieces in the series.
Don't forget about our Garden Tour, tomorrow, Saturday, August 20, 10a-2p; see a garden bursting with native plants and clematis in bloom, as well as a selection of garden art (including this sunflower, if you want!) and locally-made refreshments. See you there!


No comments:
Post a Comment