Tuesday, January 25, 2011

Management Team, Part II: Meli Topaz

Please meet Meli Topaz, also known as "Her Imperial Highness" to all inferior beings, which are, actually, all other beings. Meli (which means "Honey" in Greek, because she has naturally honey-colored highlights for which Jennifer Aniston would pay thousands of dollars; she is capable of being very sweet; and she "sticks" to me in a very non-klingon way) joined us in August of 2001. We're not certain how old she was and, besides, you never discuss a lady's age, right? So we just say she is "mature" and leave it at that. Meli is a long-haired tortoise-shell kitty. She is certainly beautiful; everyone says so and, let's face it, if you're just plain beautiful it's no longer an issue of vanity, right? It's just a fact and you live with it, no sense in false modesty.

Anyway, like many "torties", Meli has what is commonly called "Tortitude" or, as I prefer to describe it for the uninitiated, extremely rapid-cycle bipolar disorder. You never really know when the toggle will go from "kiss" to "kill" (it never seems to go the other direction with these rapid changes in mood). It doesn't help that she has a severe digestive disorder - I'm willing to bet there hasn't been a day for a very long time that she has felt genuinely well.

It's for this reason that Meli is one of my heroes. She's got a tough row to hoe but she sticks with it, giving me kisses (nose kisses are especially rare and treasured), grooming my hair and just generally keeping me on the straight and narrow. I couldn't do the things I do without her help. Thank you, Meli.

Monday, January 24, 2011

Management Team, Part I: Alex

I thought it was about time everyone met the the folks who are really in charge - because, let's face it, I certainly don't do this all on my own. I have a crack Feline Management Team of six superior cats. Over the next six posts, you'll have the chance to get to know each of them just a little bit (because no cat tells all of its secrets - even to its favorite human)!

This is Alex, or Alexander Ulysses for those more formal introductions. Alex was under the yew tree in my backyard the day I moved into my house in June of 1995 (there was a bowling ball under there, too, but I didn't find that until later). He is, by far, the best house warming gift a girl ever received. We pegged him at about a year old at the time, so he'll be 17 this year. He's all black except for little patches of white on his chest and belly, plus quite a bit of gray earned by having to supervise, well, me. He's a very sweet fellow, spends a lot of time with me in the studio (my students will attest to this). He looks quite distinguished in this photo; he's actually quite easy going.

Been busy working on the bird bowl project - have almost 8 of the 35 trees done. Had a great time at the Detroit Garden Center Winter Gardening Series on Saturday - Janet did a great job, as always. I hope you can make it this Saturday as Suzan Campbell and I will both be doing programs on Native Plants, a big topic these days. And Black Cat Pottery and Notable Greetings products will be for sale, with 10% of your purchases going directly to benefit the Detroit Garden Center and its programs.

Thank goodness it's starting to warm up - it was pretty darned cold this weekend (the coldest so far this winter); I'm glad to see it warming up!

Friday, January 14, 2011

Wall Pocket

Finally getting to my blog post for the week. It's been crazy - as always - but very good. I had a great time during my visit to the west side of the state. Spent some quality time with Laurie of Nature Connection of Kalamazoo (and our good friend, Linda from upstairs), talked long into the night with Julie (and had wonderful Indian her husband, Bob, prepared for dinner; how could they know I love Indian food?) and got some fresh air tromping around my friend Cleve's property, followed up by a delicious meal and artist talk for lunch. Not to mention a great time with the Calhoun County Master Gardeners - what a great new facility they have there at the Leila Arboretum, and what an enthusiastic audience! No wonder I was bushed by the time I got home Wednesday evening!

Been crazy in the studio, fabricating over 100 Deluxe Baby Daisies (don't ask) and more really cool wall pockets and platters; don't worry - you'll get to see (at least some of) them. And the big deal is I finally plunged into the huge Hanging Bird Bowl glazing project - 210 bird bowls, not to mention Mini Leaf Bird Feeders, Trivets and Spoon Rests, Toad Houses, Fairy Houses, Leaves and Wall Pockets. Five down; 205 to go!

And speaking of Wall Pockets, I thought I'd follow up on last week's post on the new Wall Pockets I'm doing with the Wall Pocket style I've been doing for a few years. Both of these projects are great because they require minimum tools - no fancy molds or cutting shapes; just a flat surface, some newspaper and a punch or two.

After rolling out the clay, I tear it to a shape that tapers to the bottom; I try to gear the size of the piece I tear to the size of the leaf (or leaves) I'll be using on the top. I lay this first piece, which will be the back, on a flat surface (I use shelves intended for a small kiln - perfectly flat and I can load them in directly if I need to) and punch a hole in the back to take a nail for hanging. Then I tear another slab of clay, wider at the top than the first piece, and, after scoring and slipping the two legs of the "V" it makes, I attach it to the first piece with a cone of newspaper to give it some support and create the pocket. I take some more clay, create two tapering coils and apply them to the top of the piece near the two legs of the "V" and squoosh them together so they look like twigs; you can apply some texture to these to make them more "woody". Having smoothed the remaining clay slab with a metal kidney (and here's a new tip - after using the kidney to get out the impression of the slab roller's canvas, go over the surface with your clean rolling pin to really get it smooth), I roll the leaf into the clay, cut it out, score and slip the back and apply it to the pocket. The wall pocket illustrated here uses Swamp White Oak (Quercus bicolor) so I made some acorns using cut-out tools (use a slab and a round punch to get consistent sizes for the acorns; I apply some texture using burlap and use a rosette-shaped cutter for the cap; attach the two using slip) and applied those as well. The key here is, again, to dry the piece with the base of the "V" facing the fan, if you're trying to dry it more quickly (or it may crack, fatally).

Glazing is rather complicated, a seven-step process. I use a solution of Burnt Umber for the twigs, taking the excess off with a damp sponge to get some variation in the surface (Steps 1 and 2). I use a second stain or oxide for the leaf, using the same process (Steps 3 and 4). I do put ladybugs on these and use Amaco's HF-165 (Scarlet Red) or HF-167 (Clementine) for the wing cases and HF-1 (Black) for the spots and head (Step 5). I then use wax resist over all these surfaces (Step 6). Finally, I dip to glaze, removing the excess glaze on the waxed surfaces with a damp sponge. I fire to Cone 6 with stilts. These pieces are usually water tight but sometimes the clay does weird things and creates gaps.

Hope you're keeping warm out there. We had our first big snow (finally) this week and it was great to get out and make some mounds for the Christmas trees I've scavenged; I have my own mini-forest now and I love it!

Tuesday, January 4, 2011

Finally... (and Pottery Classes)!


If you take a look at my calendar, you'll see I've finally started updating it with upcoming events. Amazing how quickly my calendar really filled up, once I sat down and went through everything!

I've gotten new handrails going downstairs and fixed the steps up a bit - thanks to my very handy-man, Keith, who also helped fabricate and install the board to display the glaze test tiles, which are almost all done (didn't realize how many glazes I actually had - 48 and counting!) The door between the stairs and the kitchen has been fixed so it now latches, so I have more control over the kitties (that's you, Meli!) when I'm bringing in big stuff. The storm doors should be in soon and then installed, completing the "facility upgrades" recommended after the Open House (not even four weeks ago).

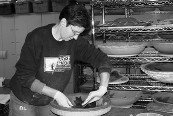
The teaching schedule is finally up as well. I'll be teaching in the studio Tuesdays (10:00am-1:00pm) and Thursdays (6:00-9:00pm) starting January 6, with the occasional "day off" to attend to other obligations. I'm going to be running it in a very informal fashion - if you can't make a session, it's not a problem - just come to the next one; and if you want to glaze or fabricate, that's fine. (Between my production commitments and the new, smaller kiln, turnaround won't be a problem.) Contact me via e-mail if you're interested in taking classes focusing on hand-building techniques.

I'm going to see if I can make a weekly commitment to post and, as a part of that, post a photo of one of my pieces. (Not sure I have 52 sufficiently unique "things", but maybe that will motivate me!) The photos may not be great - Don's coming to shoot some work on the 15th and I'm not sure how much we'll get done - so you'll just have to bear with my amateurish attempts!

This week's photos are of a wall pocket I did late last year. My "traditional" wall pockets have featured a leaf or leaves on a "back drop". My technique was to tear a clay slab into a form which roughly tapered toward the base, punch a hole in the back for a nail (I really prefer simple solutions to such concerns), then forming another, somewhat larger, clay slab over some wadded newspapers. (The myriad uses of newspaper never fails to amaze me.) The two slabs are fixed together with scoring and slip. I'd then roll two tapering coils of clay, textured if I wished, and applied them (again, scoring and slipping as I go) to the outer perimeter of the top "V", overlapping and pressing them at the base, to look like two small branches. Rolling out another slap, I smooth the texture from the slab-roller canvas using a metal kidney and roll a leaf into the slab, which I then cut out using a very sharp cutting tool. I "artfully" apply the leaf to the top of the pocket, add a lady bug, and let it dry.

I had the idea of doing more "charismatic" wall pockets, and started working with larger leaves or combinations of leaves. The pictures here are of a Redbud (Cercis canadensis) wall pocket using three large leaves. I placed the leaves - in this case, three large Redbud leaves - in a "trefoil" arrangement on the smoothed slab, roll them in with a clean rolling pin, cut them out with a sharp tool, then place them on another piece of the slab and cut out a larger slab that roughly follows the same form. The lay the second piece on a shelf, punch a centered hole based on the basic form, score and slip the edges of the first slab where I want it to adhere, and place it over some more of that newspaper onto the base slab. I carefully cut and smooth the edges around the piece. I let it dry (always, always, always - have the base of the pocket facing the fan if you're using one - otherwise the piece will not dry evenly and will crack) and then do final clean-up with some synthetic steel wool and a sharp tool, as necessary. For glazing, I stain the top surface, apply wax resist, and then glaze the rest of the piece - interior, back and edge. The glazed edge makes for a "clean" piece, somewhat like a french seam on a fine pair of trousers. I've done a few of these, including a "trefoil" of Cottonwood (Populis deltoides) leaves and one beauty with one large Paw Paw (Asimina triloba) leaf which Don purchased for his Mom's Christmas gift. I've been very happy with these pieces - they are amongst the most resolved and elegant pieces I've done. Especially in the case of the Paw Paw wall pocket (which you will hopefully see sometime this year, once we shoot it!), there isn't one thing I'd do differently.

Keep warm out there and enjoy your day!

Wednesday, December 8, 2010


I've been busy getting ready for this Saturday's Holiday Open House, getting a new kiln installed (as well as additional lighting in the garage and studio - thank you, Brian, of Electrimax!), getting more shelving up, installing a new work table (Lynn thinks it's perfect) and just generally trying to manage my usual level of self-generated insanity. We've added SoManyColors to our line up for Saturday, so come and see not only Black Cat Pottery, Notable Greetings prints and notecards, Farmbrook Designs home and garden hypertufa and Bird Homes by Tim bird houses (too good even for Park Avenue, possibly), but Glenda Hopp's uniquely lovely hand-dyed scarves and other accessories. I'm also working on possibly bringing in my friends from MINatural with Michigan-made beeswax candles and honey - still waiting on a confirmation on that, so stay connected.

We're planning warm cider and donuts in the basement studio (the cats have agreed they'll be quite happy upstairs, away from the madding crowd) so come and share some holiday cheer 10:00am-4:00pm this Saturday, December 11, 3903 Grayton St., Detroit, MI 48224.

Wednesday, December 1, 2010

More News about Open House!


This will be quick as I'm gardening(!) for Sandy and Bob this morning, then down to Rovin to pick up the glazes Stephanie has been mixing for me, then maybe up to Mt. Clemens to get some of the amazing breakfast bars from the Mt. Clemens Bakery (try them with Maranatha Creamy Roasted Almond Butter - a to-die-for combination for whom I must credit my friend Theresa), then - I'm not sure. Anyway, before I "start" my day, wanted to put the word out that we will also be featuring a selection of Chris Hopp's Farmbrook Designs hypertufa pieces (check out his website at www.farmbrookdesigns.com) and some of Tim Hanks's Bird Homes by Tim beautiful handmade redwood birdhouses with vintage hardware (his site's at www.birdhomesbytim.com) at the Open House. (Check out the pix!) Not sure the guys will have time to hang with us but I've invited them both to stick around for the festivities! So, even more excitement for you here at Black Cat Pottery on December 11, 2010, from 10:00am to 4:00pm (no stragglers - I have important dinner plans!)

Tuesday, November 30, 2010

Whew!


Yes, yes, I know: How long is it since you've heard from me? A really long time. It's been a pretty interesting year or so - some important losses and some encouraging accomplishments. I lost my dear friend Kathy Peabody in February, my Mother passed in April and my friend Gary passed in July. But Black Cat Pottery and The English Landscape are still here and going strong.

We've actually been growing and I'm now teaching in my studio, keeping class sizes small and intimate. This arrangement has worked out well, as all my equipment and materials - including gardening references and the computer (both of which have been useful) are right here for my students' use. We'll have more a more extensive schedule during the non-gardening season (January-March), so drop a line if you're interested. I've also been adding some improvements (real, actual stools, instead of five-gallon buckets for seats!), including a new kiln, shelving and ware carts (only took three hours to put that together!)

I've been doing some pretty great stuff, including some amazing new "Extra Fancy" Sunflowers, including the Ginormous "Teddy Bear" Sunflower you see here, in my very amatuerish image (gotta get with Don once he gets back from Florida). My friend Gary Kohs challenged me to make a ginormous sunflower covered with petals; I thought he was trying to kill me but - true to form - I gave it a shot and I'm pleased with the results - and can't wait to show it to Gary and Laura! Also doing some new designs for wall pockets and platters using large leaves - and I'll upload images of those as soon as I have them.

My friend Don Schulte - the photographer guy referenced above - has also bee busy, turning out a new set of Spring Wildflower notecards (with another on the way), a new set of Fall Wildflower notecards, new Clematis notecards, and upcoming sets of Herbs, more Clematis and one more set of Summer Wildflowers. And that's in his spare time, which hasn't been a lot as he and Debbie were married in September!

It was a tough gardening season but I had some great help from Andrew, Theresa and Andy. We completely renovated one property, moved a lot of mulch and drank a lot of water. I could not have done it without their help (or that of my massage therapist, Brandy, who is the best). Used to be, before I gardened professionally, that I dreaded the onset of winter; now, I confess, I quite look forward to it!

The cats are great: Alex and Meli are getting older but hanging tough and the kittens, well, the kittens aren't kittens any more! Rameses still tries to pick on Princess Nur but we're working on that.

Upcoming events include the Gifts and Greens holiday mart at Christ Church Grosse Pointe, December 3 and 4 ; and I'll be having an open house at the studio (at 3903
Grayton St., Detroit, MI 48224-4003) December 11, 10:00am to 4:00pm (no stragglers - I have a dinner appointment!) Come see what's been happening - there's always new stuff going on, enjoy some Christmas cheer and do your last minute shopping for Black Cat Pottery and Notable Greetings note cards and prints. Cheers and Happy Holidays!